










Car Diagnostic and Fault Detection Tool X-431 PRO3 LINK
6.500,00 SAR Original price was: 6.500,00 SAR.5.500,00 SARCurrent price is: 5.500,00 SAR.
Car Diagnostic Tool Launch X-431 PRO3 LINK is a multifunctional device that allows for precise vehicle diagnostics and advanced programming for all types of vehicles. This tool is distinguished by its ability to diagnose faults accurately and quickly, in addition to providing advanced programming features that allow you to adjust and modify the settings of the vehicle’s Electronic Control Unit (ECU), ensuring optimal performance restoration. With its supported modern diagnostic technologies, the Launch X-431 PRO3 LINK offers a comprehensive solution for any issues your vehicles may encounter, whether electrical or mechanical.
Launch Saudi Arabia, the official distributor of Launch products in the Kingdom, ensures you receive comprehensive warranty coverage on all its products, including the Launch X-431 PRO3 LINK. Additionally, the company provides continuous technical support through a specialized team of experts to meet your needs and respond to your inquiries professionally. Continuous updates to the device ensure you benefit from the latest diagnostic and programming technologies, keeping your device always prepared to handle all vehicle types, including the latest models. With Launch Saudi Arabia, your device is in safe hands to ensure high efficiency and accuracy in its performance.
214 in stock
 Maya / Pre-sale Questions
Need Help? Contact Us via WhatsApp
Car fault detection device Launch X-431 PRO3 LINK is one of the latest and most powerful car diagnostic and programming tools on the market, offering accurate and comprehensive vehicle fault diagnostics thanks to its advanced technologies. This device has exceptional connectivity capabilities with a wide range of vehicles, making it easy to diagnose faults and pinpoint causes with high accuracy. With its innovative and user-friendly interface, technicians and mechanics can take advantage of all the advanced features provided by this device to complete diagnostics and repairs quickly and efficiently.
Provided by Launch Saudi Arabia, the official distributor of Launch devices in the Kingdom, Car diagnostic tool Launch X-431 PRO3 LINK comes with a full warranty and exceptional technical support, ensuring long-term use and outstanding performance. Launch Saudi Arabia is committed to providing the best technical solutions to its clients in the automotive maintenance sector, offering continuous updates and after-sales services to ensure the highest levels of quality and reliability.
Car Diagnostic and Fault Detection Tool Device Profile
Car diagnostic tool Launch X-431 PRO3 LINK car fault detection device benefits from Launch’s advanced diagnostic technology, covering a wide range of vehicles and featuring powerful functions that provide accurate test results. This device is an ideal choice for technicians and maintenance workshops due to its ability to perform smart diagnostics, local diagnostics with high accuracy, and remote diagnostics through SmartLink and X-431.
Key Features:
- Smart Diagnostics: Automatically diagnoses car issues with high precision.
- Local Diagnostics: Provides in-depth diagnosis directly on-site.
- Remote Diagnostics via Smart Link: Allows remote diagnostics from a distance.
- Remote Diagnostics via X-431: Another method of remote diagnostics, ensuring accessibility anywhere.
- Maintenance Functions: Includes advanced tools to support routine car maintenance.
- One-Click Updates: Simplifies updating the device for new features and improvements.
- Diagnostic History: Keeps a record of past diagnostics for reference and troubleshooting.
- Send Notes: Enables users to send diagnostic reports or notes.
- Vehicle Coverage Verification: Ensures the device supports a wide range of vehicles.
- ADAS Calibration: Provides calibration tools for Advanced Driver Assistance Systems (ADAS) to improve safety and performance.
Car diagnostic tool device is easy to use and highly efficient, making it an indispensable tool for workshops and service centers that require quick and precise diagnostics for vehicles.
Package Contents:
The package includes the essential components, though accessories may vary depending on the region, such as diagnostic software and test connectors. It’s advised to consult with the vendor or check the attached list to verify all included items in the package.
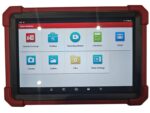
- Tablet Display x 1
The tablet is used to display test results, providing clear and accurate diagnostic insights. - Smart Link C V2.0 x 1
This device collects vehicle data and sends it to the tablet for analysis, ensuring fast and precise diagnostics. - Diagnostic Cable x 1
Used to connect the Smart Link C device to the vehicle’s OBD II port via the DLC, allowing data transfer for diagnostics and analysis. - Data Cable (Type A – Type C) x 1
Used to connect the tablet to a computer for data exchange or charging, facilitating seamless information transfer and updates. - Data Cable (Type A – Type B) x 1
This cable connects Smart Link C to a computer for J2534 reprogramming or to the tablet for vehicle diagnostics, enabling communication between devices for diagnostic and programming tasks. - Crossover Cable x 1
This cable links the Smart Link C device to a modem, allowing network connectivity for remote diagnostics or system updates. - Password Envelope x 1
Includes a sheet with the product serial number and activation code, which are used for product registration and activation of related services. - Power Adapter x 1 + Switch Adapters x 2
The power adapter is used to charge the tablet via an AC port, while the switch adapters ensure compatibility with various power outlets according to regional needs, ensuring efficient charging.
Components and Control of the Launch X-431 PRO3 LINK Car diagnostic tool Device
The diagnostic system consists of two main components:
- Tablet Display – This serves as the central processor and display of the system.
- VCI Device – The device used to access vehicle data.
Tablet Display
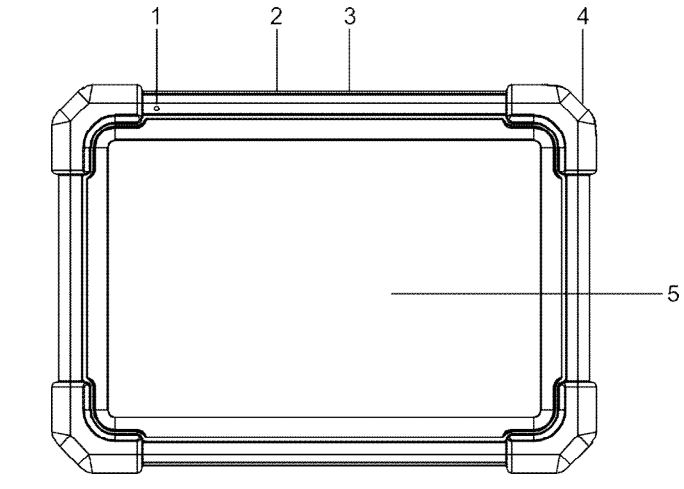
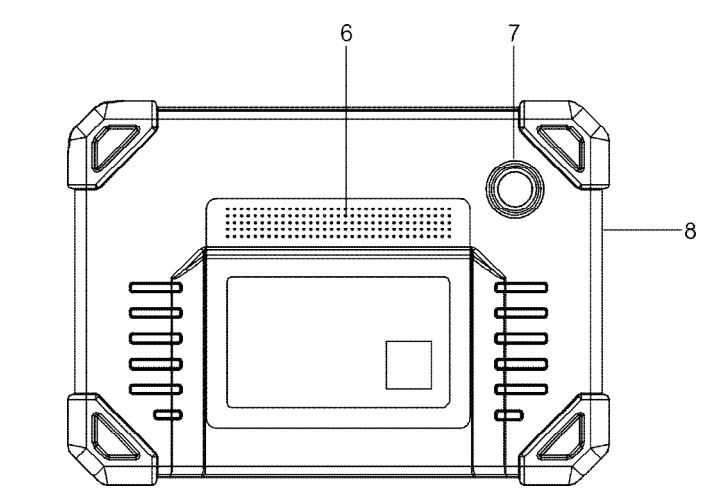
The tablet functions as the central system for data processing. It receives and analyzes live vehicle data from the Smart Link C device and displays the test results.
Here is an explanation of the components and functions of the Launch X-431 PRO3 LINK Car diagnostic tool:
- Microphone
The microphone is used for recording audio during the diagnostic process or for other purposes related to applications that require sound. - USB Type-A Port
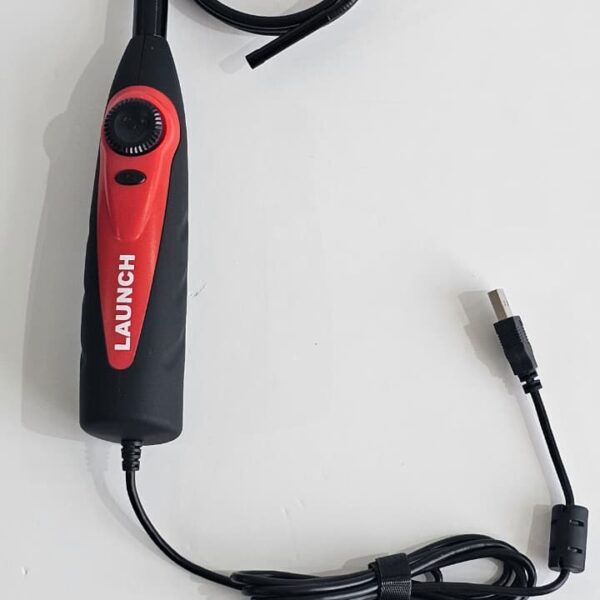
This port is used to connect to the Smart Link C device for performing vehicle diagnostics via a USB cable. It can also be used with compatible additional units (such as a video camera) or USB storage devices. - USB Type-C Port
This port is connected to the AC power source for charging the device. It can also be used to connect the tablet to a computer for data exchange. - Power Button (POWER)
The power button is used to turn the tablet on or off.
Note: Press and hold the button for 8 seconds to force a shutdown. - LCD Screen
The LCD screen displays the diagnostic test results clearly, allowing for easy interpretation of the vehicle’s condition.
- Speakers
The speakers provide the necessary sound for audio reviews during diagnostic processes or for audio alerts during inspections. They are also used to play sounds associated with tests or applications on the device. - Rear Camera
The rear camera is used to capture photos or videos of the vehicle or the surrounding environment. It can be used during diagnostic procedures that require visual documentation or even to monitor specific parts of the vehicle during the inspection. - Adjustable Stand
The adjustable stand allows for adjusting the angle of the tablet to provide greater comfort during use, whether working on a desk or in automotive maintenance environments. The stand allows you to position the device in the optimal position to improve performance and increase comfort during diagnostics.
Smart Link C V2.0 Device
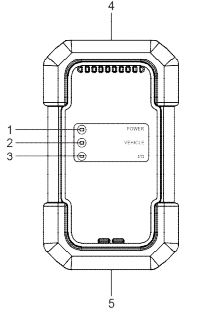
- DB-15 Diagnostic Connector
The DB-15 diagnostic connector is used to connect the Smart Link C V2.0 to the vehicle’s Data Link Connector (DLC) via the diagnostic cable. This is a critical interface for accessing the vehicle’s onboard diagnostic system, allowing the device to communicate with the vehicle and retrieve data regarding its status, faults, and other diagnostic information. This connection is the foundation for all diagnostic procedures conducted by the Smart Link C, as it enables the device to interact with the vehicle’s electronic systems. - Touchscreen Display
The touchscreen display allows users to interact with the Smart Link C device directly, providing a clear, easy-to-read interface for viewing diagnostic results. The touch functionality is essential for navigating through the device’s features, selecting specific options, and interacting with the diagnostic data in real-time. The screen provides detailed information on vehicle health, error codes, and test results, ensuring that technicians have all the data they need at their fingertips. This intuitive interface enhances the speed and accuracy of diagnostics, reducing the need for additional equipment or manual data entry. - LAN/WAN Port
The LAN/WAN port is used to connect the Smart Link C to a modem via a crossover cable, enabling remote diagnostics via the Smart Link Super. This connection allows technicians to perform diagnostics without being physically present in the workshop, making it easier to diagnose vehicles remotely. This is particularly useful for fleet management, service centers, or mobile diagnostics, where technicians can access vehicles’ diagnostic data from any location with an internet connection. The port facilitates real-time data transfer, ensuring fast and reliable communication between the vehicle and the diagnostic system. - DC-IN Power Port
The DC-IN power port allows the Smart Link C V2.0 to receive power either by connecting it to the vehicle’s DLC through the diagnostic cable or by plugging it into an external DC power source. This versatile power option ensures the device remains operational in various situations. Warning: It is important not to connect the DC-IN port to an external power source when the Smart Link C V2.0 is properly connected to the vehicle’s DLC. Doing so may cause damage, and the company is not responsible for any damages or losses resulting from this improper connection. This safety warning is crucial to avoid potential electrical issues that could harm the device or the vehicle’s electronics. - I/O Data Port
The I/O data port is used to connect the Smart Link C V2.0 to the tablet for vehicle diagnostics. It also connects to a computer for performing J2534 reprogramming operations when used as a PassThru device. This port enables seamless data transfer between the diagnostic tool and external devices, allowing for updates, diagnostics, and programming tasks to be executed efficiently. By linking the Smart Link C to the tablet or computer, technicians can access real-time diagnostic data and make adjustments to the vehicle’s programming as needed.
Key Functional Applications of the Smart Link C V2.0:
- As a Vehicle Communication Interface (VCI):
The SmartLink C V2.0 serves as a VCI, acting as the communication bridge between the diagnostic tablet and the vehicle. It collects vehicle data and transmits it to the tablet for analysis. This functionality allows the technician to perform comprehensive diagnostics, such as reading error codes, checking vehicle health, and troubleshooting problems. The VCI can be connected wirelessly or through the data cable, depending on the setup and the technician’s needs. - As a Smart Link C Device (For Clients):
In this configuration, the Smart Link C V2.0 does not communicate directly with the tablet. Instead, the tablet sends diagnostic requests remotely, while the Smart Link C connects to the network to execute commands received from a SmartLink B device (business version). This setup is typically used in enterprise or multi-location service environments, where centralized control and remote diagnostic capabilities are required. The Smart Link C bridges the gap between remote systems and on-site diagnostics. - As a J2534 PassThru Device:
The Smart Link C V2.0 functions as a local PassThru J2534 device, enabling the use of OEM diagnostic software on a computer to perform programming and reprogramming operations on vehicles. This allows technicians to update vehicle software, reflash ECUs, and apply new firmware as required by the manufacturer. This feature is crucial for dealing with complex vehicle systems that require manufacturer-specific tools and programs for programming or resetting various components. The PassThru functionality ensures compliance with OEM standards and improves the technician’s ability to manage complex diagnostic and repair tasks.
The technical specifications of the Launch X-431 PRO3 LINK vehicle diagnostic tool
| Specification | Details |
|---|---|
| Tablet | |
| Operating System | Android |
| Memory | 4GB |
| Storage | 64GB |
| Screen | 10.1-inch touchscreen, resolution 1280 x 800 pixels |
| Camera | 8.0 megapixels rear camera |
| Connectivity | Wi-Fi (802.11a/b/g/n/ac), Bluetooth |
| Operating Temperature | 0℃ ~ 50℃ |
| Storage Temperature | -20℃ ~ 70℃ |
| SmartLink C V2.0 | |
| Size | 200mm x 110mm x 47mm |
| Operating Voltage | DC 9~36V |
| Power Consumption | ≤ 6W |
| Connectivity | Wireless and wired |
| Operating Temperature | 0℃ ~ 50℃ |
Functions of the X-431 Car Diagnostic Tool

Car diagnostic and fault detection tool Launch X-431 PRO3 LINK offers various service functions such as coding, resetting, relearning, and more functions that help return the vehicle to working condition after repair or replacement. The available tests vary by the car manufacturer, year, and model. Due to continuous improvements, the available functions may change at any time. For more service functions, it is recommended to check for updates regularly.
The Launch X-431 PRO3 LINK offers 39 different functions for car inspection and maintenance. Here is the full list of these functions with an explanation for each:
Function (1): Reset Maintenance Light (Oil Reset)
When the car is used for a long period or after a certain driving time, the maintenance light starts to appear on the dashboard as an indication that an oil change is needed. In many cars, the system relies on what’s called the “oil life system,” which is a smart system that calculates the time or distance traveled since the last oil change based on driving conditions and weather factors.
The “Reset Maintenance Light” or “Oil Reset” function allows you to turn off this light after performing an oil change on the car. The purpose of this process is to reset the system so it can start calculating the time or distance until the next oil change.
Function (2): Reset Electronic Parking Brake (EPB Reset)
Electronic parking brakes are a modern feature in vehicles that replace traditional manual brakes (which use a lever to raise and lower the brakes). In these systems, the brakes are controlled by an electronic control unit (ECU), which manages the process of engaging and disengaging the brakes using an electric motor, allowing you to activate and deactivate the brakes with the touch of a button.
However, when certain parts of the electronic parking brake are replaced or if a malfunction occurs in the system, it may be necessary to reset the system to ensure it functions properly. The “Reset Electronic Parking Brake” function via a Car diagnostic tool like the Launch X-431 PRO3 LINK allows you to reactivate and calibrate the system after performing maintenance.
How the system works: Working with the electric motor: When the electronic parking brake is activated, the electric motor applies and releases the brakes based on signals from the ECU. Instead of using a manual lever, the brakes are moved electronically to achieve the car’s stationary stop.
When do you need to reset the system?
Part Replacement: When replacing important components in the electronic brake system, such as brake pads, wear sensors, or brake calipers, a reset is required. This is because the electric motor may need to adjust to the new parts. Motor Replacement: If the electric motor that operates the electronic parking brake is replaced, a reset will be necessary. Warning lights or system malfunction: If the electronic parking brake warning light is illuminated on the dashboard, a reset may be required to restore normal brake operation. How is the reset performed? Using a Car diagnostic tool such as Car diagnostic tool Launch X-431 PRO3 LINK, the vehicle’s system is connected, and the electronic parking brake is reset through the tool’s interface. The tool will send commands to the system to adjust the motor and brakes according to the new requirements or after part replacements.
When should the Electronic Parking Brake reset function be used?
- When replacing brake pads, brake calipers, or the electronic brake motor.
- If the electronic parking brake warning light comes on, indicating a system issue.
- After repairing wear sensors or the electronic brake circuit.
Resetting the Electronic Parking Brake is an essential part of maintaining these modern systems, ensuring precise and safe performance.
Function (3): Reset Steering Angle (SAS Reset)
SAS stands for Steering Angle Sensor, an electronic sensor installed in the vehicle’s steering system. This sensor accurately tracks the steering angle to ensure the vehicle stays on its proper path and that steering is appropriately adjusted. The steering angle plays a crucial role in many advanced driving systems in the vehicle, such as Electronic Stability Control (ESC) and autonomous driving systems.
Why do you need to reset the steering angle?
There are several reasons you might need to reset the steering angle (SAS), the most common ones include:
Replacing Steering Components: If mechanical parts in the steering system, such as the steering rack, steering column, tie rods, or steering joints, are replaced, this can cause a change in the steering angles. In such cases, the steering angle must be reset to ensure the system functions properly. Replacing the Steering Angle Sensor: If the steering angle sensor itself is replaced, it needs to be reset to ensure it works accurately with the rest of the system components. Repairing the Vehicle’s Structure: In the event of a collision or structural issues related to the steering axis, recalibration of the steering angle sensor may be required. Recalibration after Inspections or Maintenance: After performing inspections or maintenance, the system may need a steering angle reset to ensure that the sensor records angles accurately after corrections.
How does the sensor work?
The steering angle sensor tracks the amount of steering wheel rotation and sends this data to the vehicle’s Electronic Control Unit (ECU) for steering or stability. This data helps systems like stability control or electric power steering make real-time decisions to adjust the car’s behavior while driving.
How is the reset performed?
Resetting the steering angle is typically done using a Car diagnostic tool like the Launch X-431 PRO3 LINK:
- Verify the neutral position: Before initiating the reset, ensure that the steering wheel is in the straight-ahead position (driving in a straight line).
- Perform the reset via the diagnostic tool: Once the neutral position is confirmed, the diagnostic tool sends a command to the vehicle’s ECU to reset the steering angle. This ensures the vehicle recognizes the zero-point for steering, which serves as the reference for measuring left or right movement.
Why is it important?
Resetting the steering angle is essential to ensure that the vehicle’s stability systems function effectively. If the steering angle is inaccurate or not calibrated after repair or part replacement, it may lead to performance issues such as:
- Unresponsive Steering: The steering wheel may not respond properly, or the vehicle may drift to one side.
- Stability Control Issues: Since the steering angle is tied to systems like ESC and power steering, incorrect measurements can disable these systems.
- Warning Lights: If the steering angle is not correctly reset, warning lights may appear on the dashboard.
When should the steering angle reset be performed?
- After replacing mechanical components in the steering system such as the steering rack, steering column, or joints.
- After replacing the steering angle sensor.
- After repairing vehicle structure affecting the steering system.
- After performing wheel alignment or repairing the suspension system.
Resetting the steering angle is an important process to ensure the vehicle runs smoothly and safely on the road, and it should be performed after any changes related to the steering system.
Function (4): Bleeding the Anti-lock Braking System (ABS)
The Anti-lock Braking System (ABS) is a vehicle technology designed to enhance control while braking in driving conditions that could lead to wheel skidding. The ABS prevents the wheels from locking up during braking, helping the driver maintain control of the vehicle and reducing the stopping distance.
Why does the ABS system need “bleeding”?
The “bleeding” process in the ABS system occurs when there is air within the system or when some components, such as the ABS pump, master cylinder, or brake fluid, are replaced or repaired. When air enters the system, the hydraulic fluid cannot apply proper pressure to the brakes, leading to poor brake performance or no response from the brakes.
Reasons that may require “bleeding” the ABS system:
- Air in the system: When brake fluid is replaced or during system maintenance, air can enter the brake lines. This can affect brake performance and make them ineffective.
- Replacing ABS components: When essential ABS components like the ABS pump, master cylinder, or brake fluid are replaced, a bleeding process is necessary to remove any air that entered the system during replacement.
- Replacing the brake master cylinder or hydraulic lines: If the brake master cylinder or any other part of the hydraulic system is replaced, air must be removed to ensure smooth brake response.
- Repairing or replacing other ABS-related components: Such as ABS sensors, ABS pumps, or the electronic control unit (ECU).
How does the “bleeding” process work?
The “bleeding” process is designed to remove air from the hydraulic brake lines so the hydraulic fluid can work effectively without air bubbles that affect pressure. For ABS, this process includes testing the system’s response and may require performing double-direction tests to ensure the system is functioning correctly.
How is the “bleeding” of the ABS system performed?
Typically, a car diagnostic tool like the Launch X-431 PRO3 LINK is used to perform the bleeding process in the ABS system:
- Connecting the diagnostic tool: The diagnostic tool is connected to the vehicle being tested for the brake system.
- Initiating the bleeding process: The diagnostic tool sends commands to the ABS pump or hydraulic lines, allowing it to expel air from the system. Fluid is pumped regularly through the brake lines to ensure all air is completely removed.
- System testing: After air removal, the system is tested to ensure it responds properly, ensuring that all brakes function effectively.
Why is it important?
The “bleeding” process in the ABS system is crucial for ensuring safe driving:
- Brake performance: Air in the system can lead to weak response or failure to stop the vehicle safely.
- Maintaining control: If the system doesn’t work properly due to air in the lines, it can be difficult to control the vehicle during emergency braking.
- Reducing risks: In conditions like slippery road surfaces, ensuring no air is in the system helps guarantee optimal brake performance.
Function (5): Learning the Crankshaft Position Sensor (Gear Learning)
The Crankshaft Position Sensor is a component in the vehicle’s engine that detects the position of the crankshaft within the engine. This sensor is crucial for determining the timing of ignition and fuel injection. It sends signals to the electronic control unit (ECU) to coordinate precise timing for ignition and fuel delivery, ensuring smooth and efficient engine operation.
Why does the car need to “learn” the crankshaft position sensor?
When the crankshaft position sensor, ECU, or crankshaft gear in the engine is replaced, changes in ignition timing or fuel timing may occur. In such cases, the “gear learning” process or learning the sensor position is necessary to adjust and synchronize the system accurately.
The “gear learning” process is important to ensure that the ECU can correctly identify the crankshaft position and fuel timing.
How is the “learning” of the crankshaft position sensor performed?
- Replacing components: When the crankshaft position sensor, crankshaft gear, or ECU is replaced, this may change ignition or fuel timing in the engine.
- Using a diagnostic tool: The car diagnostic tool Launch X-431 PRO3 LINK is connected to the vehicle’s system. The tool allows the user to run a test and learn the new sensor position and adjust ignition timing.
- Learning process: After the test, the tool sends a signal to the ECU to adjust the timing based on the new sensor position. The crankshaft position is identified based on the replaced components, and the ECU adjusts ignition and fuel delivery to match the correct timing.
- Verifying results: After the learning process is complete, the system is tested to verify that the ignition and engine timing have been set accurately. If successful, the engine will run smoothly without issues related to timing or performance.
Why is this process important?
- Enhancing engine performance: Learning the crankshaft position sensor ensures that ignition and fuel delivery happen at the optimal moment, making the engine run efficiently, improving fuel consumption, and providing smoother performance.
- Preventing performance issues: If this process isn’t done after replacing the sensor or related components, it can lead to performance problems such as delayed response, engine shaking, or even difficulty starting the engine.
- Ensuring precise timing: The “learning” process ensures that the ECU can identify the correct crankshaft position, which helps maintain the engine’s peak performance.
When should this process be carried out?
- After replacing the crankshaft position sensor: When the sensor is damaged or stops functioning.
- After replacing or repairing the crankshaft gear: When ignition timing may change.
- After replacing or updating the ECU: If the ECU is updated or replaced, engine timing must be synchronized with the new components.
- When a diagnostic trouble code (DTC) indicates a “gear learning error.”
Learning the crankshaft position sensor is a vital process for ensuring accurate ignition and fuel timing. This process contributes to better engine performance and prevents issues that could arise if the timing isn’t set accurately. By using the Launch X-431 PRO3 LINK car diagnostic tool, this process can be carried out easily and precisely to ensure optimal engine operation.
Function (6): Matching the Anti-Theft System (IMMO)
The IMMO system, or Anti-Theft System, is a security feature in vehicles designed to prevent theft. The system verifies the identity of authorized electronic keys and ensures they are compatible with the vehicle’s electronic control unit (ECU) before allowing the engine to start. If an unauthorized key is attempted, the vehicle will not start the engine.
Why is “Matching the Anti-Theft System” used?
When the ignition key, engine control unit (ECU), body control module (BCM), or instrument cluster is replaced, it becomes necessary to match the IMMO system. The goal of this process is to ensure that the vehicle will properly recognize the new key and interact with the security system to safely start the engine.
How does “Matching the Anti-Theft System” work?
- Replacing components: When components such as the key, ECU, BCM, or remote control are replaced, communication errors may occur between these parts. In this case, the vehicle won’t recognize the new key, leading to a failure to start the engine.
- Performing the matching process with Car diagnostic tool: Using a car diagnostic tool like the Launch X-431 PRO3 LINK, the IMMO system is matched to update or reprogram the anti-theft system. During this process, the new key or control unit is programmed to be compatible with the system so that the vehicle can recognize it.
- Matching process: The diagnostic tool guides a series of actions to program the ECU and other components, such as the BCM, and the new key to ensure they comply with security standards. Once this process is completed, the system will recognize the new key, allowing the engine to start.
- Verifying successful matching: After completing the matching process, the vehicle’s functionality is checked to ensure that the IMMO system is correctly activated. The diagnostic tool typically provides confirmation that the matching process was successful.
Why is this process important?
- Enhanced security: Without the matching process, the system might not recognize the new key, making the vehicle vulnerable to theft. The matching ensures the system functions properly to prevent unauthorized attempts.
- Ensuring the vehicle starts: If the matching process is not completed correctly, the vehicle may not be able to start even if the new key seems to work initially. Matching ensures the vehicle will start correctly.
- Preventing malfunctions or errors: Incorrect matching could cause system errors. The diagnostic tool helps ensure all components work together to guarantee the vehicle operates properly.
When should this process be carried out?
- After replacing the ignition key or vehicle key.
- When replacing the engine control unit (ECU).
- After replacing or repairing the body control module (BCM) or instrument cluster.
- After replacing the remote control or encryption keys.
- When performing maintenance on the electronics linked to the IMMO system.
The Anti-Theft System (IMMO) matching process is essential for vehicle security and preventing theft. By using a car diagnostic tool like the Launch X-431 PRO3 LINK, the user ensures all security components are compatible, and the vehicle can correctly recognize the key or system. This process helps avoid issues with starting the vehicle while maintaining security.
Function (7): Injector Coding
Injector coding is a necessary step to adjust or correct the amount of fuel injected into each engine cylinder. The injector (or fuel injector) delivers fuel into the engine at a specific rate, and this process directly impacts engine performance and efficiency. When injectors or the engine control unit (ECU) are replaced, injector coding is required to ensure each injector functions correctly and is compatible with the engine’s control unit.
Why is “Injector Coding” used?
When injectors or the ECU are replaced, the vehicle may require reprogramming to ensure the new injectors match the engine correctly. Coding helps improve engine performance, fuel efficiency, reduce emissions, and optimize overall engine operation.
How does “Injector Coding” work?
- Replacing injectors or the ECU: When injectors or the engine control unit (ECU) are replaced, the new injectors may have different specifications from the old ones. In this case, the ECU needs to be updated to recognize the new injectors and adjust the timing and amount of fuel injected.
- Performing the coding process with a diagnostic tool: A tool like the Launch X-431 PRO3 LINK is used to perform injector coding. The process involves connecting the tool to the vehicle and using it to send the necessary settings to the ECU so that it can recognize the new injectors.
- Entering the actual injector code: In some cases, it may be necessary to enter the injector code (if available) into the engine control unit so that the correct values are set for each cylinder. These codes are typically provided by the injector manufacturer.
- Adjusting or setting injection timing: After coding, the diagnostic tool re-adjusts the injection timing so that fuel is injected at the right time and in the right amount for each cylinder. This helps improve engine efficiency and ensures optimal fuel consumption.
- Verifying the coding process: After coding, the system is checked to ensure the injectors are functioning properly and that the engine performs as expected. The diagnostic tool will typically show confirmation that the process was successful.
Why is this process important?
- Optimizing engine performance: Properly coded injectors ensure balanced fuel distribution across the cylinders, improving overall engine performance, increasing efficiency, and reducing emissions.
- Improving fuel consumption: Correct coding ensures the vehicle gets the ideal amount of fuel in each cylinder, which helps reduce fuel consumption and enhances long-term performance.
- Avoiding engine issues: Without injector coding after replacement, the engine may face performance issues such as reduced power, imbalance, or higher fuel consumption. Coding ensures the injectors work optimally.
When should this process be carried out?
- After replacing injectors: When injectors are replaced due to damage or malfunction, the new injectors should be coded to match the system.
- After replacing the engine control unit (ECU): If the ECU is replaced, injectors should be recoded to ensure proper interaction with the new ECU.
- When modifying the fuel system: If any changes are made to the fuel system or other components, injector coding should be performed.
- During engine performance checks: Sometimes, after engine diagnostics or if there are concerns about injection efficiency, injector coding may be necessary.
Function (8): Battery Matching (BAT. RESET)
Battery matching is a process of resetting the battery monitoring unit in a vehicle after replacing the battery or making any changes related to the battery system. Some vehicles require resetting the control unit or reinitializing the battery monitoring system after replacing the battery to allow the vehicle to function properly and avoid any issues that may arise from a mismatch of data between the new battery and the vehicle’s control unit.
Why is “Battery Matching” Used?
When replacing the main battery or any part of the battery monitoring system, the electronic control unit (ECU) in the vehicle may not be able to correctly recognize the new battery. Performing battery matching helps reinitialize the system to ensure that the vehicle’s control unit correctly identifies and works with the new battery.
How “Battery Matching” Works:
- Battery Replacement: When the old battery is replaced with a new one, it may be necessary to reset the system to ensure the control unit properly recognizes and works with the new battery.
- Using a Diagnostic Tool: After replacing the battery, Car diagnostic tool Launch X-431 PRO3 LINK is connected to the vehicle. The tool communicates with the vehicle’s control unit and performs the battery matching process.
- Resetting the Battery Monitoring Unit: The diagnostic tool clears fault data related to the original low battery and matches the new battery with the control unit. This ensures that the new battery works within the correct specifications and is recognized by the system.
- Resetting Stored Data: After replacement, the control unit may have outdated information about the battery, such as voltage and charge data. The diagnostic tool clears this old data and resets the stored values in the control unit to match the new battery.
- Performance Check: After completing the matching process, the system is checked to ensure the control unit has recognized the battery correctly and that the vehicle is functioning normally with the new battery. The tool may display a confirmation message or notification indicating that the process has been successfully completed.
Why is This Process Important?
- Ensuring System Recognition of the New Battery: After replacing the battery, the control unit may not function properly with the new battery without battery matching. This can lead to performance issues or even electrical system failure.
- Preventing Warning Messages: Without battery matching, a warning message may appear on the dashboard, causing concern for the user. Mismatching the battery may also disconnect the new battery from the vehicle’s electrical system.
- Achieving Optimal Performance: By ensuring the system recognizes the battery correctly, battery matching ensures optimal vehicle performance. An incompatible battery may reduce charging efficiency or cause issues in the electrical system.
- Extending Battery Life: Proper battery matching helps ensure that the vehicle manages the charging and discharging process of the battery efficiently, thereby extending the life of the new battery.
When is This Process Performed?
- When Replacing the Battery: If the main battery is replaced, battery matching should be performed to ensure the control unit correctly recognizes the new battery.
- When Replacing the Battery Monitoring Sensor: If the battery monitoring sensor or any other part of the battery system is replaced, the system needs to be reinitialized through the battery matching process.
- When Warning Messages Appear: If warning messages appear on the dashboard indicating a battery or charging issue after replacement, battery matching may be required.
Function (9): Diesel Particulate Filter Regeneration (DPF REG.)
Diesel Particulate Filter (DPF) regeneration is a process used to clean the particulate filter in a vehicle’s exhaust system, which is designed to remove fine particles (PM) or carbon from the exhaust gases before they are released into the environment. When the DPF becomes clogged due to accumulated particles, regeneration is necessary to return the filter to optimal condition.
Why is “DPF Regeneration” Used?
The DPF is a critical part of the exhaust system and helps reduce harmful emissions such as soot and fine particles. Over time, carbon accumulates inside the filter, leading to clogging and decreased efficiency in filtering the air. DPF regeneration aims to clean the filter of accumulated particles, allowing it to work efficiently again.
How is the DPF Regenerated?
- Automatic Regeneration (Automatic Regeneration): In many modern vehicles, the system automatically regenerates the DPF when it is full of particles. This is achieved by raising the engine temperature to high levels, which burns off the accumulated particles in the filter, gradually cleaning it.
- Manual Regeneration Using a Diagnostic Tool: In some cases, automatic regeneration may not be sufficient due to driving conditions or other issues. In these cases, the Launch X-431 PRO3 LINK diagnostic tool can be used to perform manual regeneration. The diagnostic tool activates the regeneration process by raising the exhaust temperature in a controlled manner to break down the accumulated carbon in the filter.
- Adding Fuel or Catalysts (in some cases): In certain cases, additives or additional fuel may be used during regeneration to increase the exhaust temperature and accelerate the burning of accumulated particles.
Why is “DPF Regeneration” Critical?
- Maintaining Engine Performance: When the DPF is clogged, it can lead to reduced engine performance. Car diagnostic tool Drivers may notice increased fuel consumption or difficulty accelerating. Regenerating the filter helps restore the engine’s optimal performance.
- Reducing Harmful Emissions: If the DPF is clogged, the vehicle may emit higher levels of harmful gases that can damage the environment. Regeneration restores the filter’s effectiveness and prevents pollution.
- Preventing Damage to Other Exhaust System Components: If the DPF is not regenerated in time, it may cause problems with other parts of the exhaust system, such as the exhaust pump or catalysts. Regenerating the DPF reduces the likelihood of these issues.
How the Diagnostic Tool Works in DPF Regeneration:
- Activating the Regeneration Process: After determining the filter’s contamination level using Car diagnostic tool, the tool activates the active regeneration process by sending signals to the vehicle’s engine to raise the exhaust temperature sufficiently.
- Verifying the Results: After the regeneration process is complete, the diagnostic tool checks to ensure the DPF has been effectively regenerated. If there are any issues with the regeneration or exhaust system, the tool will display warning messages to guide the technician in addressing the problem.
- Stopping the Regeneration Process: Once the filter is clean, the diagnostic tool stops the regeneration process and returns the system to its normal mode.
When is “DPF Regeneration” Performed?
- When Replacing Exhaust Sensors or Parts of the Exhaust System: If the exhaust pressure sensors or the DPF itself are replaced, the vehicle may need to undergo regeneration to ensure the system operates correctly.
- When a Warning Indicator Appears on the Dashboard: Many modern vehicles show a warning indicator when the DPF becomes clogged. In such cases, DPF regeneration should be performed.
- When Driving in Suboptimal Conditions: If the vehicle is primarily used for short trips or in heavy traffic, the system may not have enough time to automatically clean the DPF, making manual regeneration necessary.
When is Manual Intervention Required?
In some cases, automatic regeneration may not be sufficient, especially if the DPF is completely clogged or if the vehicle has been subjected to poor driving conditions. In these situations, the driver will need to perform manual regeneration using Car diagnostic tool Launch X-431 PRO3 LINK to ensure the accumulated particles are removed and the system returns to normal operation.
Function (10): Electronic Throttle Reset (ELEC. THROTTLE RLRN)
The electronic throttle is a vital component in the vehicle’s engine, controlling the amount of air entering the engine based on commands from the Engine Control Unit (ECU). The throttle adjusts the engine’s speed according to varying needs such as acceleration or deceleration. Over time, or after certain repairs or modifications to the engine system, the electronic throttle may require resetting to ensure the engine operates optimally.
Why is “Electronic Throttle Reset” used?
The electronic throttle reset is usually performed to ensure the throttle control system works efficiently and adapts correctly to the engine and operational conditions. When parts related to the throttle are replaced, or when changes are made in the system, the electronic control unit (ECU) needs to reset to its default settings to regulate airflow precisely.
When is the “Electronic Throttle Reset” performed?
Several scenarios may require an electronic throttle reset:
- After replacing the engine or engine components such as valves, carburetors, or the electronic throttle motor.
- After replacing the Engine Control Unit (ECU) or any parts related to throttle management.
- When changes are made to the engine settings, such as adjusting intake or fuel components.
- If there is an issue with the vehicle’s acceleration or slow response, which may indicate a throttle problem.
- When the throttle warning light is illuminated on the dashboard, indicating a malfunction in the ECU.
How is the “Electronic Throttle Reset” done?
- Using Car diagnostic tool (such as Launch X-431 PRO3 LINK): The diagnostic tool is connected to the ECU through the tool’s interface.
- Activating the reset process: The diagnostic tool sends a command to the ECU to reset the throttle’s stored settings. This restores the engine’s learned values to their default position.
- Recalibrating the throttle: After resetting, the electronic throttle motor is recalibrated to ensure it responds accurately to commands from the ECU, improving the vehicle’s accelerator (acceleration) and deceleration response.
- Verification check: After resetting, the diagnostic tool conducts a check to ensure that the throttle has returned to its normal state and that its response is precise and effective.
How does the electronic throttle work?
The electronic throttle controls the airflow to the engine via an electric motor and sensors that monitor the incoming air amount. The ECU determines the required airflow based on several factors, such as:
- The position of the gas pedal (acceleration).
- Driving conditions such as speed or load.
- Engine temperature.
- Oxygen sensors measuring oxygen levels in the exhaust.
Why is “Electronic Throttle Reset” important?
- Improved engine response: After resetting, the throttle works efficiently, improving the vehicle’s response to acceleration.
- Solving acceleration issues: Resetting may resolve issues with slow acceleration response or jerky vehicle movement.
- Restoring coordination between the throttle and ECU: When stored values change, a misalignment may occur between the throttle and ECU. Resetting ensures proper coordination.
- Turning off erroneous warning lights: Sometimes, a problem with the throttle can cause the warning light to illuminate on the dashboard. Resetting can resolve this issue.
The importance of resetting in modern vehicles: With the evolution of automotive technology, electronic throttle systems have become more complex. This makes it essential to use a diagnostic tool, such as the Launch X-431 PRO3 LINK, to reset or recalibrate the throttle after repairs or modifications. This can improve engine control accuracy and provide optimized, smooth engine performance.
Function (11): Gearbox Matching (GEARBOX)
Gearbox matching (or known as “learning the gearbox”) is an essential process to ensure the optimal performance of the vehicle’s transmission after any modification or repair to the system. The gearbox is responsible for transferring power from the engine to the wheels by shifting gears, helping the vehicle adapt to different speeds.
Why is “Gearbox Matching” used?
Gearbox matching is a critical step to ensure the system functions smoothly after repairs or changes to the gearbox. When components of the gearbox are replaced or reassembled, the way power is transferred between the engine and the wheels may change. Therefore, the vehicle’s ECU needs to “learn” or “match” the new values to ensure smooth gear shifts.
When is “Gearbox Matching” performed?
Several scenarios require gearbox matching:
- When repairing or replacing the gearbox: If the gearbox or any of its components, such as the torque converter, hydraulic motor, or internal parts, are replaced.
- After reassembling the gearbox: If the gearbox has been disassembled for maintenance or repair, the system needs to perform a matching process to ensure smooth gear transitions.
- After replacing the transmission control unit (TCM): When the TCM is replaced, the system must learn how to interact with the new parts to ensure optimal coordination.
- If there are issues with shifting gears: If the driver notices difficulty in shifting gears, such as delayed shifts or problems moving from one gear to another, gearbox matching may be required.
- After replacing transmission fluid: In some cases, after changing the transmission fluid, the system needs to be matched to ensure the correct fluids are circulating properly.
How is “Gearbox Matching” done?
- Using a diagnostic tool: A diagnostic tool, such as Car diagnostic tool Launch X-431 PRO3 LINK, is connected to the vehicle through the tool’s interface.
- Performing the matching process via the tool: The necessary commands are sent from the diagnostic tool to the ECU to perform the “learning” or “matching” of the gearbox. This requires the ECU to adapt to the system changes and learn how to coordinate with the new or modified parts.
- Resetting stored values: After replacing or repairing, the ECU resets the stored values for gear shifting, ensuring smooth gear transitions during driving.
- Inspection and verification: After performing gearbox matching, the diagnostic tool is used to verify that the learning process was successful and the system is operating optimally.
Why is “Gearbox Matching” important?
- Improved gear shifting quality: Gearbox matching helps improve the shifting process, leading to smoother and more comfortable driving.
- Reduced wear on gearbox components: Proper matching reduces unnecessary wear on gearbox parts, extending the system’s lifespan.
- Fixing shifting issues: If there are problems with shifting gears (such as delays or hard shifting), matching can resolve these by better coordinating the ECU with other parts.
- Enhanced driver responsiveness: The process improves the gearbox’s response to the driver’s input, making the vehicle more responsive when switching between gears.
How to improve gearbox performance after matching?
- Test drive: After completing the gearbox matching process, a test drive is necessary to ensure all gears shift smoothly without issues.
- Regular maintenance: By performing regular gearbox maintenance (such as changing the fluid and cleaning filters), the gearbox’s performance can be maintained.
- Using diagnostic tools periodically: To detect issues early, Car diagnostic tool Launch X-431 PRO3 LINK can be used periodically to check if all systems are functioning efficiently.
Function (12): Adaptive Front Lighting System Reset (AFS RESET)
The Adaptive Front Lighting System (AFS) is a modern technology that helps improve the driver’s visibility while driving at night or in low light conditions. The primary goal of this system is to adjust the direction of the headlights in line with the vehicle’s movement, helping the driver see the road better and enhancing driving safety.
Why is “Adaptive Front Lighting System Reset” Used?
The reset function is used to ensure the system works efficiently after making changes or repairs to the components of the front lighting system. When headlights are replaced, or when the angles or moving parts of the headlights are adjusted, the system needs to be reset to ensure the lighting aligns correctly with the vehicle’s movement.
When is the “Adaptive Front Lighting System Reset” Performed?
There are several cases where resetting the adaptive headlights is necessary:
- When replacing headlights: If the headlights are replaced due to damage or upgrades, recalibration may be required to ensure the direction of light is appropriate.
- When repairing or replacing parts of the adaptive lighting system: If there are faults or damage in the moving parts controlling the headlights’ direction, such as motors or sensors that measure the vehicle’s motion, the system needs to be reset.
- When adjusting headlight angles: In some cases, the headlight angles need to be adjusted to ensure proper lighting in different driving conditions, such as downhill roads or turns.
- After repairing or replacing the control unit: If the control unit for the adaptive lighting system is replaced or reprogrammed, the system must relearn the correct settings to ensure proper interaction with the other components.
- When noticing inconsistency in lighting: If the driver observes that the headlights do not move normally or the lighting is unbalanced, the reset process may be required.
How is the “Adaptive Front Lighting System Reset” Performed?
- Using a diagnostic tool: Car diagnostic tool tool such as Launch X-431 PRO3 LINK is connected to the vehicle via the interface.
- Performing the reset via the tool: The tool sends commands to the control unit of the adaptive lighting system to reset the headlight angles and settings.
- Resetting the directions: The system then directs the headlights to the correct position based on the new calibration, ensuring the lighting covers the road ahead properly.
- Checking the settings: After the reset is performed, the system is checked to verify that the headlights are functioning correctly and adjusting to the vehicle’s movement while driving.
Why is “Adaptive Front Lighting System Reset” Important?
- Improved night visibility: It ensures the headlights follow the vehicle’s movement accurately, enhancing the driver’s ability to see the road and curves more clearly.
- Increased safety: The adaptive lighting reduces glare for oncoming vehicles and helps the driver avoid obstacles on the road more easily.
- Improved system performance: A proper reset ensures that the system works more efficiently, enhancing the vehicle’s overall performance and providing a safer, more comfortable driving experience.
- Maintaining headlight balance: The reset helps ensure that the headlights maintain proper balance, providing uniform light distribution.
How to Improve the Performance of the Adaptive Front Lighting System?
- Regular inspection: It is important to periodically check the headlights to ensure they are functioning correctly, especially if the vehicle has an adaptive front lighting system.
- Routine maintenance: Headlights should be checked and replaced if damaged, and motors or sensors controlling the angle of the headlights should be inspected for issues.
- Testing after reset: After resetting the adaptive headlights, a test drive should be done to ensure the headlights move correctly and provide balanced, effective lighting.
Function (13): Sunroof Initialization (SUNROOF)
A sunroof is a comfort and aesthetic feature in modern cars, offering the driver and passengers an enjoyable open-air driving experience. This feature allows the driver to open or close the roof at the touch of a button, providing additional ventilation and, at times, a clear view of the sky during driving.
Why is “Sunroof Initialization” Used?
Sunroof initialization is used to adjust the system and ensure it operates efficiently after modifications or repairs to the sunroof components. Sometimes, the sunroof may malfunction after parts are replaced or serviced, making it necessary to reinitialize the system to ensure proper operation.
When is the “Sunroof Initialization” Performed?
The initialization is performed in several cases that require system adjustment or reset:
- When replacing or repairing sunroof components: If parts of the sunroof, such as motors, guide arms, or hinges, are replaced or repaired, initialization is required to ensure the system works smoothly.
- When there is a loss or malfunction in the sunroof memory: If the sunroof’s control unit loses its settings or encounters memory errors, it can cause malfunction. Initialization is required to restore the original settings.
- After system updates or modifications: If the system has been updated or changes are made to the sunroof control unit, initialization ensures the system is compatible with these updates.
- When experiencing issues with the sunroof’s operation: If the sunroof does not open fully or close properly, initialization can help resolve these issues.
How is the “Sunroof Initialization” Performed?
- Using a diagnostic tool: A diagnostic tool such as Launch X-431 PRO3 LINK is connected to the vehicle via the interface.
- Initiating the process: Through the tool, commands are sent to the sunroof control unit to perform initialization, which involves resetting the roof settings and redefining its paths.
- Resetting the memory functions: In this process, old memory with incorrect settings is cleared, and default or updated settings are loaded for the sunroof.
- System testing: After initialization, the system is tested to ensure the sunroof opens and closes as expected according to the required settings.
Why is “Sunroof Initialization” Important?
- Restoring normal operation: Initialization ensures the sunroof works efficiently and smoothly, just as it did originally, preventing system malfunctions.
- Enhanced comfort: With the sunroof operating correctly, the driver and passengers can enjoy an improved driving experience with fresh air and an open sky view.
- Protection of electrical components: Initialization ensures the sunroof’s electrical system functions properly, reducing the risk of damage to motors or wiring.
- Control over additional features: Some sunroof systems come with extra features, like automatic closing when it rains or adjusting the angle manually or automatically. Initialization ensures these features work correctly.
How to Improve Sunroof Performance?
- Regular maintenance: Periodically check the sunroof to ensure no damage or obstructions are preventing its smooth operation.
- Continuous cleaning: Keep the sunroof components clean from dust and debris to prevent malfunctions.
- Checking the proper seal: Ensure the sunroof closes tightly to keep the vehicle well-sealed against rain and wind.
Function (14): Suspension Level Calibration (SUS RESET)
Suspension level calibration is an important process to adjust the vehicle’s ride height and ensure performance stability and safety. This is particularly relevant in vehicles equipped with air suspension systems or adjustable suspension, which control the vehicle’s height automatically or manually depending on the conditions.
Why is “Suspension Level Calibration” Used?
Air suspension systems or other suspension systems often undergo pressure and changes due to varying loads or modifications to vehicle components. In such cases, the vehicle’s height may deviate from the ideal level, resulting in driving issues such as instability or impacting braking and wheel performance.
When is the “Suspension Level Calibration” Performed?
Suspension level calibration is performed in the following situations:
- When replacing or repairing air suspension parts: If sensors, control units, or other mechanical components are replaced, calibration ensures the vehicle returns to the correct height post-repair.
- When the vehicle height is incorrect: If the vehicle’s height is imbalanced (e.g., the vehicle is too low or too high compared to its normal level), calibration helps correct this issue.
- After system maintenance: When the suspension system’s motor, sensors, or cylinders are adjusted or repaired, calibration is necessary to ensure the system operates efficiently after servicing.
- When a fault or warning appears in the system: If a suspension system issue or warning light is triggered on the dashboard, calibration is essential to restore the vehicle’s balance.
How is the “Suspension Level Calibration” Performed?
- Using a diagnostic tool: Car diagnostic tool such as Launch X-431 PRO3 LINK is connected to the vehicle via the interface.
- Choosing the calibration function: The calibration option (SUS RESET) is selected via the tool. This instructs the control unit to perform automatic or manual calibration of the suspension system.
- Performing the calibration: The diagnostic tool sends commands to the suspension control unit to adjust the sensors and set the correct height level. In some systems, the driver may need to drive the vehicle on level ground during the process.
- Verifying settings: After calibration, the suspension level is tested to ensure the vehicle is raised or lowered to the desired height.
Why is “Suspension Level Calibration” Important?
- Driving stability: Adjusting the vehicle’s height ensures a more stable and safer driving experience, improving comfort and performance.
- Improved suspension performance: An imbalanced suspension can negatively affect driving. Calibration ensures the system operates at full efficiency, ensuring vehicle components perform well under all conditions.
- System protection: Incorrect suspension height can place stress on other components such as tires or axle shafts. Proper calibration ensures the system operates without overloading moving parts.
- Increased comfort: Proper suspension level enhances driving comfort by improving shock absorption and reducing the impact of rough roads or potholes.
- Extended system life: Regular calibration promotes the longevity of the components by maintaining balance within the suspension system and reducing wear over time.
How to Improve Calibration Process?
- Regular inspection: It is crucial to periodically check the suspension system, especially if changes in driving comfort are noticed or warning lights appear.
- Pay attention to warning signs: If any issues, such as abnormal vehicle height or excessive raise/lowering, are noticed, the calibration should be performed immediately.
- Address maintenance promptly: If any suspension system component is damaged or faulty, replace it quickly and perform calibration afterward.
Suspension level calibration (SUS RESET) is an essential process to adjust the vehicle’s height and ensure system stability. By using a diagnostic tool like Launch X-431 PRO3 LINK, you can ensure the vehicle operates efficiently after modifications or maintenance of the suspension system. Calibration helps improve driving comfort, protect the system, and extend the vehicle’s lifespan.
Function (15): EGR Valve Adaptation
The EGR (Exhaust Gas Recirculation) valve adaptation function is essential in engine management systems, contributing to engine efficiency and reducing harmful emissions. The EGR valve redirects a portion of exhaust gases back into the combustion chamber to lower high temperatures and improve fuel efficiency.
Why is “EGR Valve Adaptation” used?
The EGR valve often requires adaptation or calibration after maintenance or replacement of associated components. This adaptation ensures the EGR valve operates accurately and efficiently according to required standards, contributing to optimal vehicle performance and achieving environmental goals.
What is the role of the EGR valve?
- Reducing Nitrogen Oxide (NOx) Emissions: High temperatures inside internal combustion engines produce significant amounts of nitrogen oxides (NOx). The EGR valve helps reduce these emissions by recirculating exhaust gases into the engine to lower temperatures.
- Improving Fuel Efficiency: By returning exhaust gases to the combustion chamber, it helps reduce fuel consumption by maintaining combustion temperature.
- Extending Engine Life: The EGR valve reduces internal engine temperatures, relieving stress on other engine components like cylinders, thus extending the engine’s lifespan.
When is “EGR Valve Adaptation” performed?
- After Replacing the EGR Valve or its Components: If the EGR valve or its components (such as the control valve or sensors) are replaced, the system needs adaptation to ensure proper function.
- After Cleaning the EGR Valve: Carbon buildup in the EGR valve from exhaust gases may hinder its operation. After cleaning, adaptation is necessary to restore efficient functioning.
- When EGR Error Codes Appear: If faults arise in the system or diagnostic trouble codes (DTC) appear in the ECU related to the EGR, adaptation is part of troubleshooting.
- After Updating the Electronic System: If the engine control unit (ECU) or engine management software is updated, EGR valve adaptation is necessary to ensure proper integration with the new system.
How is “EGR Valve Adaptation” performed?
- Using a Diagnostic Tool: Connect Car diagnostic tool like Launch X-431 PRO3 LINK to the car’s OBD-II port.
- Selecting the EGR Adaptation Function: Choose the “EGR Valve Adaptation” option from the tool’s menu.
- Performing the Adaptation: The diagnostic tool sends commands to the ECU to adjust the EGR valve settings and ensure proper operation.
- Verifying the Process: After adaptation, test the EGR valve’s performance by monitoring exhaust emissions or error codes to confirm proper functioning.
- Resetting Error Codes: After successful adaptation, ensure any EGR-related error codes are cleared from the ECU.
Why is “EGR Valve Adaptation” important?
- Improves Engine Efficiency: Ensures the EGR valve operates within specifications, improving fuel efficiency and reducing emissions.
- Reduces Harmful Emissions: Ensures that the system effectively reduces NOx emissions, helping the vehicle meet environmental standards.
- Lowers Fuel Consumption: Proper EGR valve adaptation reduces fuel consumption by efficiently recirculating exhaust gases.
- Enhances Engine Response: If the EGR valve is not functioning correctly, engine performance, especially at high speeds or during acceleration, can suffer. Adaptation ensures optimal engine response.
The EGR valve adaptation is a crucial process to ensure that the EGR valve works optimally within the system. This process enhances engine performance, reduces harmful emissions, and guarantees better fuel efficiency.
Function (16): Seat Calibration
Seat calibration is a vital function provided by Car diagnostic tool Launch X-431 PRO3 LINK, especially for vehicles with memory-equipped seats. Calibration is necessary when the seat or its components, such as the electric motors or memory units, are replaced or repaired.
Why is “Seat Calibration” important?
Modern vehicles often feature intelligent seat functions like memory, allowing the driver and passengers to adjust seats comfortably and store these settings for future use. When a seat or part of it is replaced, calibration is essential to ensure that the memory system works correctly and that the seat responds to commands from the driver or passengers.
When is seat calibration performed?
- After Replacing the Seat: If a seat is replaced with a new one, especially if it includes electrical components (such as motors that adjust seat position), calibration ensures proper interaction between these components.
- After Repairing the Seat or Electric Motors: If the seat experiences issues with its electric motor (like being unable to adjust the seat position), calibration ensures proper function after repair.
- After Replacing the Seat Control Unit: If the unit controlling the electric seats or related components is replaced, calibration ensures that the new unit coordinates properly with the vehicle’s system.
- After Updating the Memory System: If the seat has a memory function and the ECU requires an update, calibration ensures that stored settings work efficiently.
How is seat calibration performed?
- Connecting the Diagnostic Tool: Connect the Car diagnostic tool Launch X-431 PRO3 LINK to the vehicle via the OBD-II port.
- Selecting the “Seat Calibration” Function: Choose the seat memory or seat parameters calibration option from the tool’s menu.
- Performing Calibration: The diagnostic tool sends commands to the ECU to adjust the seat functions, ensuring all memory and electrical settings are correctly positioned.
- Testing Performance: After calibration, test the seat to ensure it adjusts to stored positions and responds accurately.
Benefits:
- Improves Comfort: Ensures adjustable seats match the driver or passengers’ preferences for greater comfort during driving.
- Easier Retrieval of Settings: Ensures the seat memory stores and retrieves positions correctly.
- Enhances Response: A smoothly functioning seat system responds quickly and accurately to adjustments.
Seat calibration ensures that electric seats with memory functions operate correctly after component replacement or repair, enhancing comfort and flexibility while ensuring smooth interaction with the vehicle’s electronic system.
Function (17): Tyre Reset
Tyre reset is a crucial function provided by Car diagnostic tool Launch X-431 PRO3 LINK vehicle diagnostic tool. This function is especially necessary when tyres are replaced, their size is altered, or TPMS (Tyre Pressure Monitoring System) sensors are replaced.
Why is “Tyre Reset” important?
The TPMS monitors the air pressure in tyres and alerts the driver if the pressure is low, which could lead to driving issues or safety risks. When tyres are replaced or their size is altered, the system requires a “reset” to recognize the new tyres and ensure that the sensors work properly.
When is the “Tyre Reset” performed?
- After Replacing Tyres: When old tyres are replaced with new ones, especially if the size of the tyres differs, the system needs resetting to ensure that the TPMS sensors work correctly with the new tyres.
- After Modifying Tyre Size: If the driver changes the tyre size (such as switching to larger or smaller tyres), resetting the system ensures proper pressure monitoring based on the new size.
- After Replacing or Repairing TPMS Sensors: If TPMS sensors are replaced or repaired due to inaccurate warnings or malfunctions, the system requires a reset to link the new sensors to the central system.
- During TPMS System Maintenance: If there are issues with the TPMS system that require inspection or maintenance, resetting may be necessary to restore full functionality.
How is “Tyre Reset” performed?
- Connecting the Diagnostic Tool: Connect Car diagnostic tool Launch X-431 PRO3 LINK to the vehicle’s OBD-II port.
- Selecting the “Tyre Reset” Function: From the diagnostic tool’s menu, select the option to reset the TPMS.
- Performing the Reset: The tool sends commands to the TPMS ECU to reset the system, updating it to work with new or altered tyres and sensors.
- Testing the System: After resetting, test the system to ensure it correctly identifies all tyres and displays accurate pressure readings.
Benefits:
- Improved Tyre Pressure Monitoring Accuracy: The system accurately monitors pressure after resetting to account for new or modified tyres.
- Enhanced Safety: Proper tyre pressure monitoring helps prevent accidents related to low tyre pressure.
- Greater Driver Convenience: The driver receives accurate notifications from the system about tyre pressure, improving safety and reliability.
Tyre reset is a key process to ensure that the TPMS correctly identifies new or modified tyres, ensuring accurate pressure monitoring and improving overall vehicle safety and performance.
Function (18): Coolant Bleed
The coolant bleed function provided by the Launch X-431 PRO3 LINK scanner is an advanced feature used to remove trapped air from the engine’s cooling system. This procedure is extremely important for maintaining the cooling system’s efficiency and preventing the engine from overheating.
What is the Importance of Coolant Bleed?
The cooling system works to reduce the engine’s temperature to ensure its efficient operation and prevent damage due to excessive heat. When maintenance is carried out on the system, such as replacing the pump, changing the coolant, or repairing any part of the cooling system, air may enter the system. The presence of air in the system hinders the coolant flow, reducing cooling efficiency and potentially leading to engine overheating or damage to other components.
When Do You Need to Perform Coolant Bleed?
- After replacing or repairing cooling system components:
- Water pump
- Radiator
- Hoses or flow control valve
- After replacing the coolant: If the system is drained and refilled with coolant, bleeding the system is essential to remove any trapped air.
- When there are signs of air in the system:
- Gurgling sounds in the radiator
- Fluctuating engine temperature
- Reduced heating efficiency inside the car
- When servicing modern vehicles equipped with electronic pumps: Bleeding ensures the pump operates efficiently without trapped air affecting the flow.
How to Bleed Coolant Using the Launch X-431 PRO3 LINK?
- Connect the Device: Connect the scanner to the vehicle’s OBD-II port.
- Select the “Coolant Bleed” Function: Choose this option from the available functions to start the process.
- Activate the Electronic Pump: The scanner activates the electronic pump to circulate the coolant through the system, helping expel trapped air.
- Monitor the Process: The device shows system data such as flow pressure and coolant temperature during the process.
- Recheck the System: After the procedure, check for air removal by monitoring engine temperature stability and smooth coolant flow.
Benefits of Coolant Bleed:
- Improves Cooling Efficiency: Removing air ensures smooth coolant flow within the engine.
- Prevents Overheating: Protects the engine from damage due to excessive heating.
- Extends Component Lifespan: Helps preserve the radiator, pump, and hoses.
- Improves In-Car Heating Performance: The heating system relies on the coolant cycle.
Coolant bleed is a crucial process for maintaining the cooling system’s efficiency and preventing engine overheating. The Launch X-431 PRO3 LINK scanner makes this process accurate and easy, helping technicians and drivers maintain the cooling system’s performance and ensure the engine and its components last longer.
Function (19): AdBlue Reset
The AdBlue reset function available in Car diagnostic tool Launch X-431 PRO3 LINK scanner is used to reset the AdBlue system in diesel-powered vehicles (clean diesel). The AdBlue system is a crucial part of modern emissions control systems, working to reduce nitrogen oxide (NOx) emissions through Selective Catalytic Reduction (SCR) technology.
What is AdBlue and Why Does It Need to Be Reset?
AdBlue is a water-based urea solution injected into the exhaust system to convert NOx into nitrogen and less harmful water vapor. The system needs resetting in the following cases:
- When refilling the AdBlue tank after depletion.
- After replacing components like the SCR control unit or AdBlue tank.
- When warnings appear on the dashboard indicating AdBlue malfunction or low levels.
Importance of AdBlue Reset:
- Clears Warnings: Helps clear warning messages or alerts on the dashboard related to AdBlue.
- Prevents Performance Limitations: Some vehicles limit speed or prevent engine start when the AdBlue tank is empty without resetting the system.
- Ensures SCR System Efficiency: Balances the system to ensure effective emissions reduction.
When is AdBlue Reset Performed?
- Refilling the Tank: After adding AdBlue, the system may need resetting to update the liquid level in the control unit.
- Replacing System Components: Such as the SCR control unit, AdBlue pump, or fluid level sensor.
- When Error Codes Appear: If there are faults associated with the AdBlue system.
How to Reset AdBlue Using the Launch X-431 PRO3 LINK?
- Connect the Device to the Vehicle: Connect the scanner to the OBD-II port of the vehicle.
- Go to the Function Menu: From the menu, select “AdBlue Reset.”
- Perform the Reset Procedure: The scanner will confirm the action after checking that the AdBlue tank is filled.
- Reset the Stored Values: The scanner resets stored values in the control unit (ECU), such as fluid level and clears fault codes.
- Verify the Process: After resetting, ensure the warning messages disappear and the SCR system operates normally.
Benefits of AdBlue Reset:
- Ensures Environmental Compliance: Restores the system’s efficiency to ensure emissions are reduced.
- Improves Vehicle Performance: Prevents performance limitations caused by AdBlue errors.
- Saves Time and Effort: The process is simple and precise when using the scanner.
Tips for Using the AdBlue System:
- Only use recommended AdBlue solutions to avoid system damage.
- Do not overfill the AdBlue tank to prevent liquid leakage.
- If problems persist, perform a thorough SCR system check and consult a professional technician.
AdBlue reset is a fundamental step to ensure the proper functioning of the emission reduction system after refilling the fluid or performing maintenance. Car diagnostic tool Launch X-431 PRO3 LINK scanner simplifies this process, ensuring optimal vehicle performance and minimizing harmful emissions.
Function (20): NOx Sensor Reset
The NOx sensor reset function available in Car diagnostic tool Launch X-431 PRO3 LINK scanner is designed to adjust or reconfigure the stored values related to the NOx sensor in the vehicle’s Electronic Control Unit (ECU). The NOx sensor is a key component in the emissions control system, used to measure the concentration of nitrogen oxides (NOx) in exhaust gases.
What is the NOx Sensor and Why Does It Need to Be Reset?
The NOx sensor is used to measure the levels of nitrogen oxides emitted by the engine and is an essential part of SCR (Selective Catalytic Reduction) systems, which improve the catalytic converter’s efficiency and reduce harmful emissions. Resetting the NOx sensor is necessary for the following reasons:
- After Replacing the NOx Sensor: To ensure the new sensor is compatible with the ECU.
- Clearing Diagnostic Trouble Codes (DTCs): If faults related to the NOx sensor have been recorded in the system.
- Improving SCR System Performance: After replacing the catalytic converter or other repairs related to the exhaust system.
Importance of NOx Sensor Reset:
- Ensures Accuracy: It adjusts the stored values in the ECU to match the new sensor.
- Clears Faults: Helps in removing fault codes and dashboard warnings related to the NOx sensor.
- Improves Efficiency: Contributes to the effective performance of the SCR system for environmental compliance and reduced fuel consumption.
When Should You Perform a NOx Sensor Reset?
- After replacing the old NOx sensor.
- After replacing or repairing the catalytic converter.
- When DTCs related to the NOx sensor appear, such as measurement errors or damage.
- When servicing or updating the SCR system to enhance its performance.
How to Reset the NOx Sensor Using the Launch X-431 PRO3 LINK?
- Connect the Device: Connect the scanner to the OBD-II port of the vehicle.
- Go to the Menu: Select the “NOx Sensor Reset” option from the available functions.
- Follow the Instructions: The device will guide the user to confirm the process and ensure the system is compatible with the new sensor.
- Reset the Sensor: It updates the stored values in the ECU related to the NOx sensor.
- Clear Fault Codes: It clears the fault codes and system warnings.
- Verify the Process: Start the vehicle and check if the dashboard warnings disappear and the NOx sensor data is read normally.
Benefits of NOx Sensor Reset:
- Improves Environmental Performance: Resets the sensor to work efficiently and ensures reduced harmful emissions.
- Clears Faults: Resolves issues related to the NOx sensor, preventing the vehicle from running in limp mode.
- System Integration: Ensures full compatibility of the new sensor with the rest of the emissions control system.
The NOx sensor reset is a crucial step to ensure the efficient functioning of the emissions control system after replacing the sensor or performing system repairs. Using the Launch X-431 PRO3 LINK scanner, this process is straightforward and accurate, restoring the vehicle to its optimal condition and complying with environmental emission standards.
Function (21): AC System Relearn/Initialization
The AC System Relearn/Initialization function in Car diagnostic tool Launch X-431 PRO3 LINK scanner is used to adjust the vehicle’s air conditioning system and relearn the default settings after repairing or replacing key components in the system. This procedure is important to ensure the air conditioning system works efficiently and at its optimal performance.
Importance of AC System Relearn/Initialization:
- Adjusts Initial Settings: This process helps adjust system parameters to match new or repaired components.
- Ensures Optimal Performance: It restores the system to its normal operating condition after losing stored data or replacing the control unit.
- Eliminates Faults: Clears system errors and ensures smooth operation of the air conditioning system.
When Should You Perform AC System Relearn/Initialization?
- After replacing system components:
- Replacing the air conditioning ECU (Electronic Control Unit)
- Replacing the compressor or other major parts like the evaporator or condenser
- After losing ECU memory:
- When the battery has been disconnected for an extended period or replaced
- When the control unit is updated or reprogrammed
- When system faults or abnormal performance occur:
- Poor cooling or heating
- Strange sounds from the system
- Unresponsive AC settings
How to Perform AC System Relearn/Initialization Using the Launch X-431 PRO3 LINK?
- Connect the Device to the Vehicle: Plug the scanner into the OBD-II port of the vehicle.
- Select the System: Choose “Air Conditioning System” from the available system options.
- Select the Function: Choose the AC System Relearn/Initialization function.
- Follow Instructions: The device will provide step-by-step guidance. Some steps may require starting the vehicle or manually adjusting the AC settings.
- Complete the Process: Once initialization is finished, any stored errors will be cleared, and the system will be reset.
- Verify: Turn on the air conditioning to ensure the system operates correctly and efficiently.
Benefits of AC System Relearn/Initialization:
- Improves System Efficiency: Helps achieve the best possible cooling or heating performance.
- Extends Component Life: Ensures new or repaired components operate under optimal conditions.
- Clears Faults: Clears fault codes and resets the system to avoid future problems.
- Provides Comfort: Ensures the AC settings respond accurately according to the driver’s and passengers’ needs.
The AC System Relearn/Initialization function is a necessary step when repairing or replacing any major part of the air conditioning system. Using the Launch X-431 PRO3 LINK scanner, this process is quick and easy, ensuring the air conditioning system is restored to its natural functionality and improving driving comfort.
Function (22): High Voltage Battery Detection
The high voltage battery detection function in Car diagnostic tool Launch X-431 PRO3 LINK is used to diagnose high-voltage batteries in electric and hybrid vehicles. These batteries are crucial for powering electric motors and storing energy, making it vital to ensure their condition and efficiency.
Importance of High Voltage Battery Detection:
- Maintaining Performance: Helps ensure the battery operates efficiently.
- Enhancing Safety: Diagnosing issues that could impact the safety of the battery or vehicle.
- Avoiding Costly Failures: Early detection of problems allows for timely intervention, preventing further damage.
When Should You Use High Voltage Battery Detection?
- Signs of Weak Battery:
- Reduced driving range of the electric vehicle.
- Slow charging or rapid discharge of the battery.
- Warning Indicators:
- Diagnostic trouble codes (DTCs) related to the electrical system or battery appearing on the dashboard.
- After Maintenance:
- After replacing the battery or any components related to the electrical system.
- After an Accident:
- After a collision or crash that may have affected the battery.
- Before Buying a Used Vehicle:
- To check the condition of the high voltage battery in an electric or hybrid vehicle.
How to Perform High Voltage Battery Detection Using the Launch X-431 PRO3 LINK:
- Connect the Device to the Vehicle: Plug the scanner into the vehicle’s OBD-II port.
- Select the System: Choose “Battery System” or “High Voltage Battery” from the main menu.
- Run the Test: Select the “High Voltage Battery Detection” option and follow the on-screen instructions.
- Examine the Results: The device will display detailed data about the battery, including:
- State of Charge (SOC)
- State of Health (SOH)
- Cell temperature
- Voltage per cell
- Faults or issues present
- Analyze the Data: If there are any problems or performance drops, the system helps identify causes and necessary actions.
Benefits of High Voltage Battery Detection:
- Enhances Vehicle Efficiency: Ensures the battery provides the required performance for the electric motor.
- Prolongs Battery Life: Helps identify weak cells or potential failures early, maintaining the overall health of the battery.
- Improves Safety: Prevents accidents related to battery failures such as overheating or electric leaks.
- Saves Costs: Early diagnosis can reduce the cost of battery replacement by addressing issues before they escalate.
The high voltage battery detection function is a crucial tool to maintain the efficiency and safety of electric and hybrid vehicles. Using the Launch X-431 PRO3 LINK diagnostic tool, drivers and technicians can accurately diagnose the battery’s condition, ensuring sustained performance and preventing future issues.
Function (23): Windows Calibration
The windows calibration function in the Launch X-431 PRO3 LINK diagnostic tool is used to adjust the electric window system in the vehicle after component replacement or maintenance. The main purpose of this function is to restore proper window operation and ensure that all related features, such as auto-up and auto-down, function correctly.
Importance of Windows Calibration:
- Restores Automatic Functions: Such as the automatic up feature when the window button is fully pressed.
- Ensures Safety: Guarantees the system responds in emergencies, like stopping the window if an obstruction is detected while closing.
- Maintains Comfort: Ensures smooth and rapid window operation without malfunctions or interruptions.
When Do You Need to Calibrate the Windows?
- After Replacing Components:
- Replacing the window motor.
- Replacing the glass or window frame.
- When Malfunctions Occur:
- Failure of the auto-up or auto-down feature.
- Windows stop working or operate irregularly.
- After Electrical System Maintenance:
- Such as replacing the battery or control unit.
- When Errors Appear:
- If warning messages or diagnostic trouble codes related to the window system appear.
How to Perform Windows Calibration Using the Launch X-431 PRO3 LINK:
- Connect the Device: Plug the scanner into the OBD-II port of the vehicle.
- Select the System: From the main menu, choose “Windows System.”
- Activate the Calibration Function: Select “Windows Calibration” and follow the on-screen instructions.
- Perform the Test: The device will prompt you to move the windows up and down to record the final positions.
- Verify the Results: Check that the windows function properly, including the auto-up feature and obstruction detection.
Benefits of Windows Calibration:
- Improves Performance: Ensures smoother and more responsive window movement.
- Saves Time and Effort: Resolves window system issues without the need for expensive component replacements.
- Enhances User Experience: Guarantees that windows operate comfortably and accurately, improving the driving experience.
- Increases Safety: Ensures the system detects obstructions and prevents accidents, such as trapping hands or fingers.
Function (24): Language Change
The language change function in Car diagnostic tool Launch X-431 PRO3 LINK allows users to modify the language settings of the vehicle’s central control unit system. This feature is particularly useful to ensure the system interface matches the language preference of the driver or technician using the vehicle or performing repairs.
Importance of the Language Change Function:
- Ease of Use: Makes the system more understandable and easier to navigate by selecting the appropriate language.
- Adaptability to User Needs: Enables users who prefer a specific language to interact with the vehicle settings smoothly.
- Global Support: Especially useful for imported vehicles where the default language might be unfamiliar.
- Improves Diagnostic Accuracy: Using a familiar language helps avoid mistakes when reading messages or settings.
When Do You Need to Change the Language?
- Importing a Vehicle: When importing a car from another country where the default language is unfamiliar.
- Changing the User: If the new owner of the vehicle prefers a different language.
- After System Updates or Resets: If the system is updated or reset, the default language settings may return to the original one.
- Multiple Users: When the vehicle is used by different people who prefer different languages.
Function (25): Air/Fuel Reset
The Air/Fuel Reset function is used to adjust or teach the air-to-fuel ratio parameters in the engine, aiming to optimize overall engine performance and ensure its efficiency. This ratio is a key factor affecting fuel consumption, exhaust emissions, and engine performance under different operating conditions.
Importance of Air/Fuel Reset:
- Achieving Optimal Combustion Efficiency: Ensures the air-fuel mixture is finely tuned for complete combustion.
- Reducing Emissions: Helps improve the performance of the emission control system and reduce harmful pollutants.
- Enhancing Engine Response: Makes the engine more responsive and efficient in various driving conditions.
- Maintaining Economical Fuel Consumption: Leads to noticeable improvements in fuel efficiency.
When to Use Air/Fuel Reset:
- After replacing or cleaning the Oxygen Sensor (O2 Sensor).
- When replacing the Mass Air Flow Sensor (MAF).
- After repairing or replacing the Engine Control Unit (ECU).
- When changes are made to the exhaust system components, such as catalytic converters.
- When noticing unstable engine performance or increased fuel consumption.
How to Perform Air/Fuel Reset Using Launch X-431 PRO3 LINK:
- Connect the Device: Plug the diagnostic tool into the vehicle’s OBD-II port.
- Select the System: Choose the Engine Control Unit (ECU) from the main menu.
- Access the Function: Look for the “A/F Reset” or “Air/Fuel Reset” option.
- Start the Process: Follow the on-screen instructions to perform the reset.
- Confirmation: Wait for the process to complete successfully, then check the engine’s operation.
Benefits of Air/Fuel Reset:
- Improved Engine Performance: Leads to more power and torque from the engine.
- Reduced Faults: Prevents error codes related to the air/fuel mixture.
- Extended Component Lifespan: Reduces strain on combustion system components and exhaust system.
- Environmental Compliance: Helps meet emission standards.
Function (26): Transport Mode
Transport Mode is a feature in Car diagnostic tools like Launch X-431 PRO3 LINK, usually activated during the transportation of a vehicle over long distances or when the vehicle is shipped for the first time after manufacture or transport.
When Transport Mode is activated, energy consumption in the vehicle is reduced by disabling certain systems or limiting unnecessary functions. These may include disabling automatic engine startup or preventing certain devices such as networks or interior lights from operating, as well as limiting the vehicle’s maximum speed.
The purpose of Transport Mode is to protect the vehicle’s electronic components from potential damage during transport or to ensure minimal energy consumption. After the vehicle reaches its destination or after the transport period ends, Transport Mode should be deactivated to restore the vehicle to its normal condition. This can be done through a diagnostic tool to enable all systems to function fully.
Function (27): Stop/Start Reset
The Stop/Start Reset function is found in Car diagnostic tool Launch X-431 PRO3 LINK, and it is used to reset or reconfigure the automatic stop/start system of the engine.
The Stop/Start system saves fuel by automatically shutting off the engine when the vehicle stops at a traffic light or while idling, and restarting it when the driver presses the accelerator. This technology aims to reduce fuel consumption and exhaust emissions in urban areas.
When the battery, Electronic Control Unit (ECU), or any other system component is replaced, or if there’s a malfunction in the system, the driver may need to reset this function to ensure it operates correctly. Resetting restores the original system settings, allowing the system to perform optimally in the future.
This reset process is typically carried out via the diagnostic tool, which erases and resets the system’s stored values to ensure compatibility with the vehicle’s other electronic systems.
Function (28): Intelligent Cruise Control System Reset
The Intelligent Cruise Control System Reset is an advanced function in Car diagnostic tool Launch X-431 PRO3 LINK. This system automatically maintains the vehicle’s speed on the road and is capable of adjusting its speed in response to traffic conditions.
When the control unit or system components, such as radar sensors or cameras, are replaced, the system may require resetting to ensure proper function. The reset helps restore the system’s settings to their optimal state and updates the values stored in the ECU of the intelligent cruise control system.
This function ensures that all system components work harmoniously after any adjustments or repairs, enhancing driving safety and providing greater comfort for the driver, especially when traveling on highways.
Function (29): Engine Power Balance Monitoring
Engine Power Balance Monitoring is an essential function in Car diagnostic tool Launch X-431 PRO3 LINK. This function analyzes the power distribution produced by each cylinder in the engine to ensure the engine operates efficiently.
Each cylinder generates a specific amount of power during the combustion cycle, and if one cylinder operates less efficiently than others, it may lead to abnormal vibrations or reduced engine performance. With power balance monitoring, the diagnostic tool analyzes the crankshaft acceleration (the shaft that drives the engine) during different operating stages, and identifies the power generated by each cylinder.
If a cylinder fails to produce the required power, it may indicate an issue with the system, such as clogged injectors, low fuel pressure, faulty spark plugs, or engine valve malfunctions.
By using the Launch X-431 PRO3 LINK to monitor engine power balance, technicians can pinpoint inefficient cylinders and perform the necessary maintenance, helping improve engine performance, reduce fuel consumption, and prevent potential long-term damage.
Function (30): GPF Regeneration
Gas Particulate Filter (GPF) regeneration is a process designed to clean the filter that accumulates dust and fine particles produced during fuel combustion. This filter is crucial in reducing vehicle emissions and protecting the environment. However, over time, the filter can fill with particles, making cleaning necessary to restore its efficiency.
The process starts when the vehicle system detects that the filter is full of particles. At this point, the “regeneration” or “rejuvenation” process is activated, which involves raising the exhaust gas temperature to burn off these particles, helping clean the filter.
Typically, this process is automatic, but in some cases, manual intervention may be required, such as when there are exhaust system issues or after maintenance. Once the filter is cleaned, the vehicle can operate more efficiently, resulting in lower fuel consumption and reduced harmful emissions.
By using the Launch X-431 PRO3 LINK Car diagnostic tool, the driver or technician can monitor this process and ensure successful regeneration. Once complete, the filter can perform its function as effectively as when it was new, resulting in a cleaner and more efficient vehicle.
Function (31): Motor Angle Calibration
Motor Angle Calibration is a critical process in vehicles with electronically controlled engines. The aim of this process is to ensure the engine operates at the correct angle, as determined by the motor angle sensor. In some cases, there may be discrepancies between the angle detected by the sensor and the actual angle of the engine, leading to reduced performance or operational issues.
When such discrepancies are detected or when certain engine components, like motors or parts related to motor angle control, are replaced, calibration is necessary to adjust the values stored in the ECU and align the sensor with the actual motor angle.
Calibration typically involves a thorough inspection of the moving parts in the engine to ensure everything is in place. The settings are then reset to match the values specified by the vehicle manufacturer. This helps improve engine response and ensures smooth and efficient engine operation.
Once calibration is successfully completed, the engine can operate more efficiently, improving overall performance and providing a better driving experience.
Function (32): TPMS Reset
The TPMS (Tire Pressure Monitoring System) Reset is an important process that is carried out when tires are changed or when there is an issue with the TPMS. This system is essential in modern vehicles, as it continuously monitors tire pressure and alerts the driver if pressure is low or high in any tire.
When tires are replaced or when TPMS sensors are added or modified, the system needs to be reset to recognize the new settings. The reset process involves clearing the old tire pressure values from the vehicle’s ECU and updating them with the current values.
Typically, a warning will appear on the dashboard if there is an issue with the TPMS or if tire pressures are unbalanced. After performing the reset, the system checks all tires and adjusts them correctly, ensuring that alerts and pressure readings are accurate.
Once the reset is complete, the TPMS will operate correctly and provide appropriate warnings when needed, enhancing safety and improving the driving experience.
Function (33): IMMO Programming
IMMO (Immobilizer) Programming is a critical process for vehicle security, and it is included in the vehicle diagnostic tool. The IMMO system prevents the vehicle from starting if there is an attempted theft, by ensuring that only an authorized key is used.
When new units such as the ECU or key transmitter/receiver, or the Body Control Module (BCM) are replaced or programmed, the system needs to be reprogrammed to recognize the new key or devices. This ensures that the vehicle remains protected from theft by confirming that the system can distinguish between authorized and unauthorized keys.
The programming process involves several steps where the diagnostic tool reads and updates the system data, ensuring it recognizes authorized keys and any new keys that may have been replaced or programmed. In some cases, it may require erasing old data from the control unit and re-adding approved keys.
By programming this system, the owner or technician can ensure that the vehicle will only start with the correct, programmed key, keeping the vehicle secure.
Function (34): Crankshaft Position Sensor Learning Reset
Crankshaft Position Sensor Learning Reset is a process aimed at resetting the system related to the crankshaft position sensor in the vehicle, which is crucial for engine operation. The crankshaft position sensor monitors the position and rotational angle of the crankshaft, which is vital for ignition timing in internal combustion engines.
When the crankshaft position sensor is replaced or if there is an issue with the sensor’s data, the system requires a “learning reset” to ensure the sensor works properly with the ECU. This process helps ensure that ignition timing is precise, and the engine operates efficiently, thus preventing issues like engine stalling or difficulty starting.
The process is carried out through a diagnostic tool, which sends signals to the system to learn the crankshaft position based on the new or modified sensor. The ECU then processes the data from the sensor to adjust the ignition timing and ensure proper engine performance.
Crankshaft position sensor learning reset is essential after sensor replacement or major engine maintenance to ensure that the system works efficiently and safely.
Function (35): Intercooler Air Control Reset
The Intercooler Air Control Reset is a process designed to reset or reconfigure the system that controls the airflow to the intercooler in the vehicle’s engine. The intercooler is used to cool the compressed air entering the engine, helping improve combustion efficiency and reduce engine temperature.
The system may need a reset for various reasons, such as replacing parts of the system or when there is airflow disruption due to dirt accumulation or malfunctions. When components of the intercooler air control system, such as sensors or pipes, are replaced, a reset may be required to ensure proper functioning.
The reset is performed using the Car Diagnostic and Fault Detection Tool X-431 PRO3 LINK connected to the vehicle’s Engine Control Unit (ECU). The tool sends signals to the relevant systems to adjust or reconfigure the airflow settings, ensuring the intercooler operates at peak efficiency, which improves engine performance and maintains optimal temperatures.
This process ensures that all components of the intercooler system work together harmoniously, contributing to improved overall vehicle performance, especially in high-performance engines or those operating in extreme heat environments.
Function (36): Front Camera Calibration
Front camera calibration using the Car Diagnostic and Fault Detection Tool X-431 PRO3 LINK is a crucial process to ensure the camera mounted at the front of the vehicle functions efficiently and accurately in providing images and information about the surrounding environment. These cameras are a vital part of driver assistance systems such as forward collision warning, parking assistance, and distance control systems, as well as lane departure warnings.
When a new camera is installed, maintenance is done on the camera, or components affecting the camera’s position (such as sensors or parts around the windshield) are replaced, calibration must be performed using the Car Diagnostic and Fault Detection Tool X-431 PRO3 LINK to ensure the displayed image or transmitted information is accurate.
The Car Diagnostic and Fault Detection Tool X-431 PRO3 LINK calibrates the camera by:
- Ensuring Camera Position: It checks and adjusts the camera’s angle to ensure it is correctly oriented.
- Resetting Calibration: The tool updates the vehicle’s control unit so that the camera records the scene properly.
- Testing Functions: After calibration, a test is conducted to verify that the camera’s functions, such as obstacle detection or warnings, work correctly.
By using the Car Diagnostic and Fault Detection Tool X-431 PRO3 LINK, it is ensured that safety systems like collision warnings, automatic steering, and other camera-based systems operate effectively, enhancing driving safety and driver comfort.
Function (37): Oxygen Sensor Cleaning
Cleaning the oxygen sensor in a vehicle is a process aimed at removing dirt and deposits that may affect the sensor’s performance. The oxygen sensor is a crucial part of the engine management system, monitoring the oxygen level in the exhaust gases and sending this information to the Engine Control Unit (ECU) to improve engine performance and fuel efficiency. A faulty oxygen sensor can lead to reduced engine efficiency, higher fuel consumption, and increased exhaust emissions.
Steps for Cleaning the Oxygen Sensor:
- Turn off the engine: Before starting any maintenance, ensure the engine is cool, and the vehicle is parked safely.
- Locate the oxygen sensor: It is usually found at the front of the exhaust pipes, just after the engine, or near the catalytic converter in the exhaust line. Some vehicles may have more than one oxygen sensor.
- Disconnect the sensor: Disconnect the electrical connector of the sensor before cleaning it to avoid any damage or electrical contact.
- Remove the sensor: Using a suitable wrench, carefully remove the sensor. It may require some effort if heat buildup or corrosion has occurred.
- Clean the sensor: Use a soft brush or cloth to gently clean the metal part of the sensor. You can also use a mild cleaner (such as a metal parts cleaner or fuel) to remove accumulated dirt and deposits.
- Reinstall the sensor: After cleaning, securely reinstall the sensor, and reconnect the electrical connector.
- Test the vehicle: After reinstalling the sensor, start the engine and check that the engine is running smoothly. You may need to recheck the sensor readings using the Car Diagnostic and Fault Detection Tool X-431 PRO3 LINK to ensure it is functioning correctly.
Function (38): Smart Control Unit Learning Reset
The Smart Control Unit Learning Reset is a process performed using the Car Diagnostic and Fault Detection Tool X-431 PRO3 LINK to re-teach the smart control unit of the vehicle after modifications or replacement of parts affecting the driving performance.
This process is typically performed after replacing parts such as the Engine Control Unit (ECU) or making adjustments to systems controlling the engine or wheels. The goal of the learning reset is to ensure that the smart control unit adapts to the new vehicle conditions, allowing for improved performance and a better system response while driving.
Using the Car Diagnostic and Fault Detection Tool X-431 PRO3 LINK, specialists reconfigure the control unit to reset its settings and enhance how the vehicle interacts with various systems, such as the engine and drivetrain. This helps ensure optimal system operation and the highest levels of safety and efficiency.
Function (39): Smart Steering Unit Calibration
The Smart Steering Unit Calibration is an important process carried out using the Car Diagnostic and Fault Detection Tool X-431 PRO3 LINK to adjust the settings of the smart steering unit after replacing or modifying parts of the steering system in the vehicle.
The smart steering unit (which sometimes includes systems like electric steering or computer-controlled systems) controls the steering mechanism based on signals from sensors and specific data. After replacing key components in this system, such as the steering wheel, electric steering motor, or sensors linked to the steering, the steering unit may need recalibration to continue functioning correctly.
Calibration is typically performed after any part replacement or repairs to reduce risks associated with steering, such as difficulty steering or incorrect steering feedback. Using the Car Diagnostic and Fault Detection Tool X-431 PRO3 LINK, the smart steering unit is calibrated to ensure the system works efficiently, providing accurate and smooth steering response, ensuring high safety standards for the user.
Auxiliary Devices for the Launch X-431 PRO3 LINK Car Diagnostic and Fault Detection Tool
ADAS (Calibration)
This unit allows for efficient and accurate calibration of various driver assistance systems based on cameras and radar, such as the front camera for lane departure warning system, radar sensor for adaptive cruise control (ACC), or the camera for adaptive headlights. This unit requires the use of a dedicated ADAS calibration tool (sold separately). For more details, please refer to the user manual included with the unit.
TPMS
This unit enables the configuration of the tablet as a tool to activate and diagnose the Tire Pressure Monitoring System (TPMS) sensor, providing the capability to activate the TPMS sensor, program the TPMS sensor, and perform the relearning process. This unit requires the use of a compatible TSGUN device (sold separately). For more details, please refer to the user manual included with the unit.
S2-2 Sensorbox
This unit allows you to diagnose and simulate sensor faults in the vehicle quickly and easily. This unit requires the use of a compatible S2-2 Sensorbox (sold separately). For more details, please refer to the user manual included with the unit.
S2-2 Multimeter
This unit allows you to measure physical parameters such as voltage, resistance, frequency, and others. It uses the same devices as the S2-2 Sensorbox unit. For more details, please refer to the user manual included with the S2-2 Sensorbox device.
BST360 (Battery Tester)
This unit allows you to test the battery more quickly and easily. This unit requires the use of a Bluetooth-enabled battery tester (sold separately). For more details, please refer to the user manual included with the unit.
Videoscope
This unit allows you to inspect hard-to-reach parts of the engine, fuel tank, or brake system. This unit requires the use of a compatible Videoscope device (sold separately). For more details, please refer to the user manual included with the unit.
Immobilizer Programmer
This unit allows you to perform reading and writing functions for car keys, EEPROM, MCU, and EEPROM/FLASH of the engine control unit and transmission. This unit requires the use of a specific immobilizer programmer (sold separately). For more details, please refer to the user manual included with the unit.
Oscilloscope – Optional
This unit allows technicians in service workshops to quickly assess faults in vehicle electronic equipment and wiring. For more details, please refer to the user manual included with the unit.
Additional Notes: If you are using the device for the first time, it is recommended to read the complete manual included with the device for additional details on advanced settings. You can contact the technical support team of Launch Saudi Arabia if you encounter any issues during the setup process.
With that, you will have completed the setup of the Launch X-431 PRO3 LINK device and be ready to use it for professional vehicle diagnostics.
Conclusion
The Launch X-431 PRO3 LINK Car Diagnostic and Fault Detection Tool is one of the most powerful and accurate car diagnostic tools available on the market today, combining advanced technology and the ability to diagnose a wide range of vehicles of all types. The device is distinguished by its ability to perform comprehensive and precise diagnostics in a short time, saving time and effort for maintenance workshops and automotive technicians.
Through Launch Saudi Arabia, you can confidently acquire this exceptional tool, as it is the official distributor of Launch products in the Kingdom of Saudi Arabia and the Middle East region. The company offers a full warranty on the device, along with excellent technical support to meet the needs of its customers. Whether you need an inquiry or technical assistance, Launch Saudi Arabia is the ideal destination to provide you with all your needs at the highest levels of quality and service.
With Launch Saudi Arabia, you are in safe hands, where you can benefit from the warranty and full support for the Launch X-431 PRO3 Car Diagnostic Tool, ensuring you a distinguished experience and unmatched performance in the world of car diagnostics.
User Manual for Launch X-431 PRO3 LINK Car Diagnostic and Fault Detection Tool


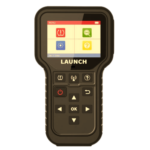





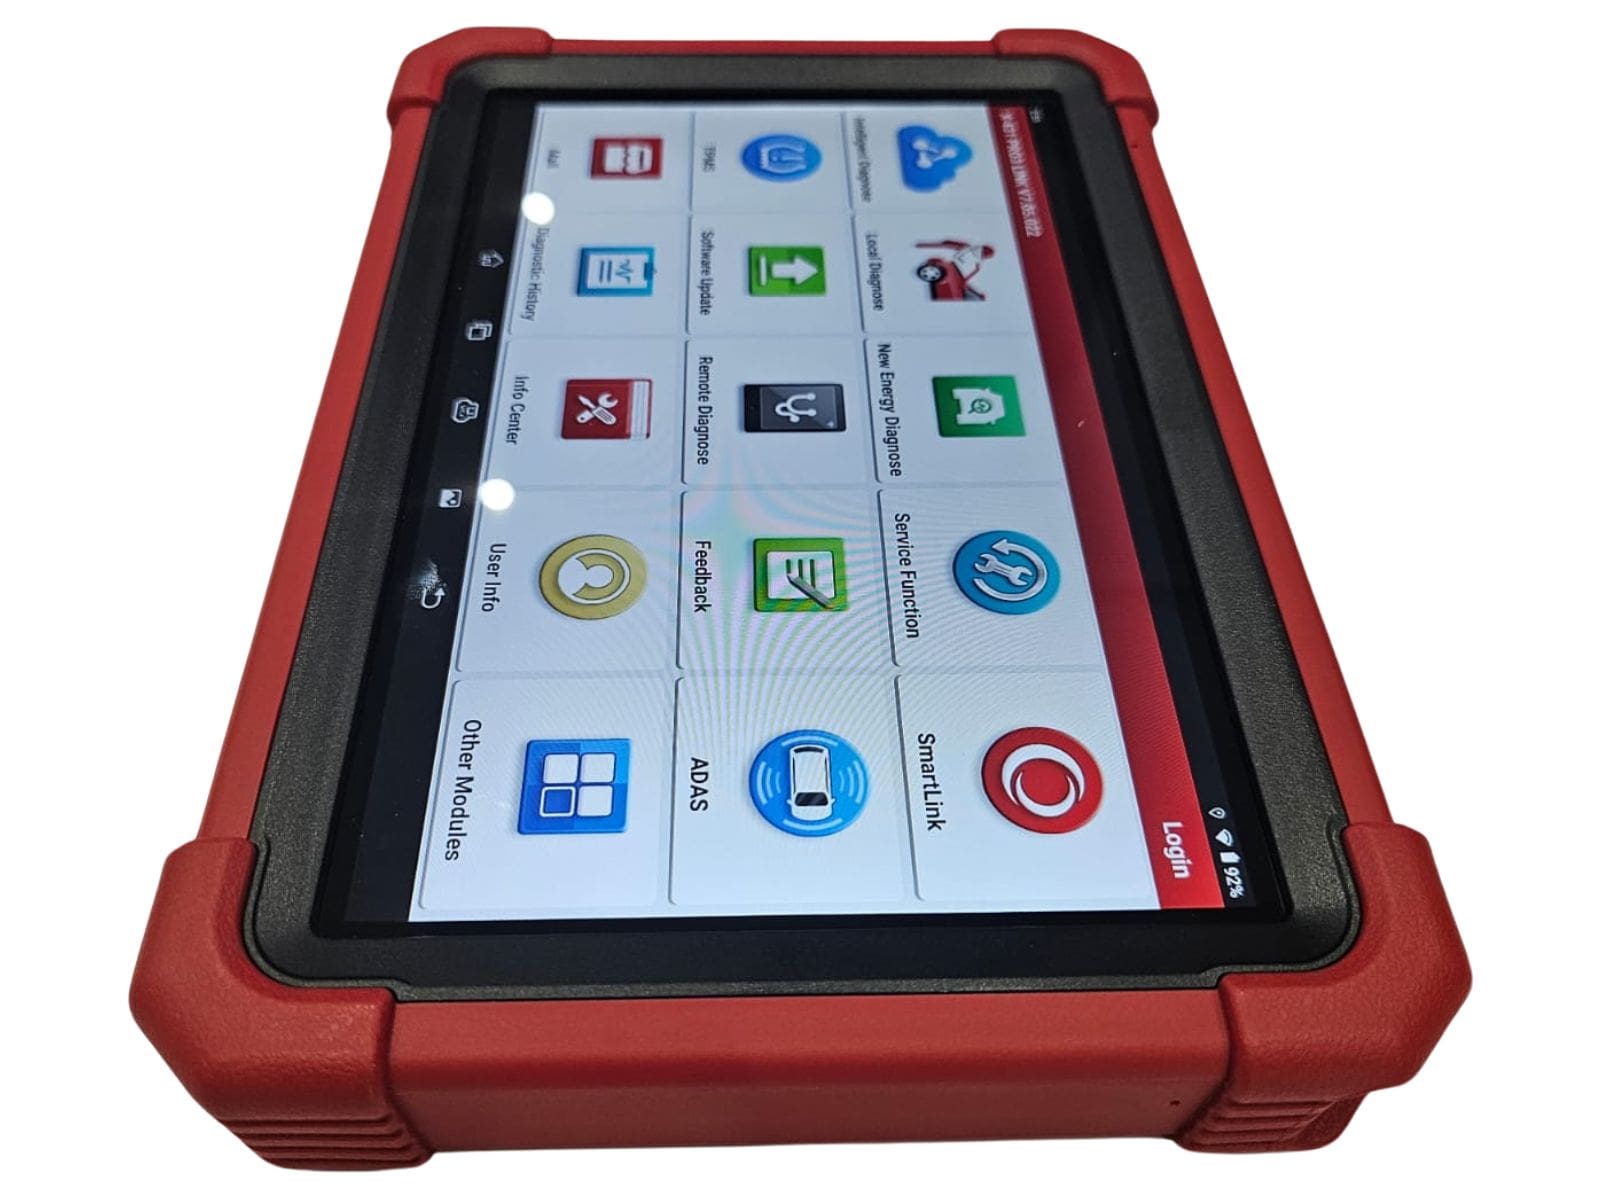
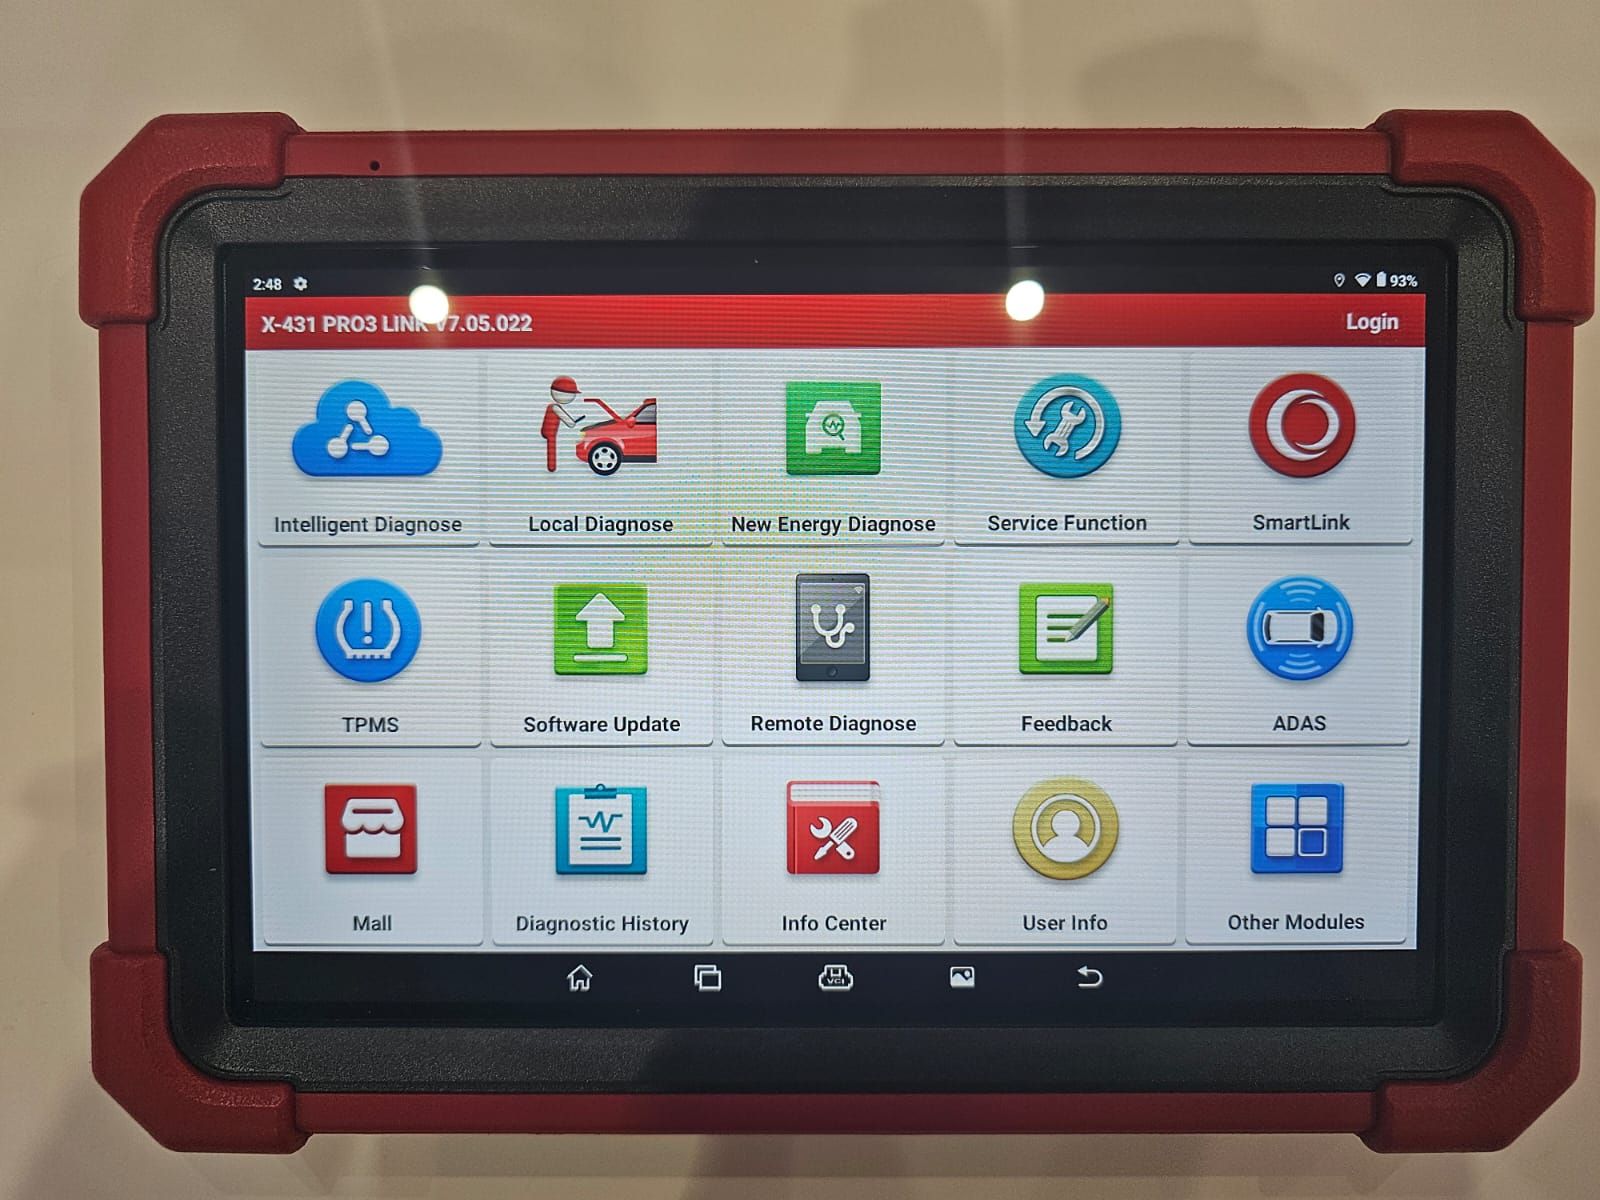
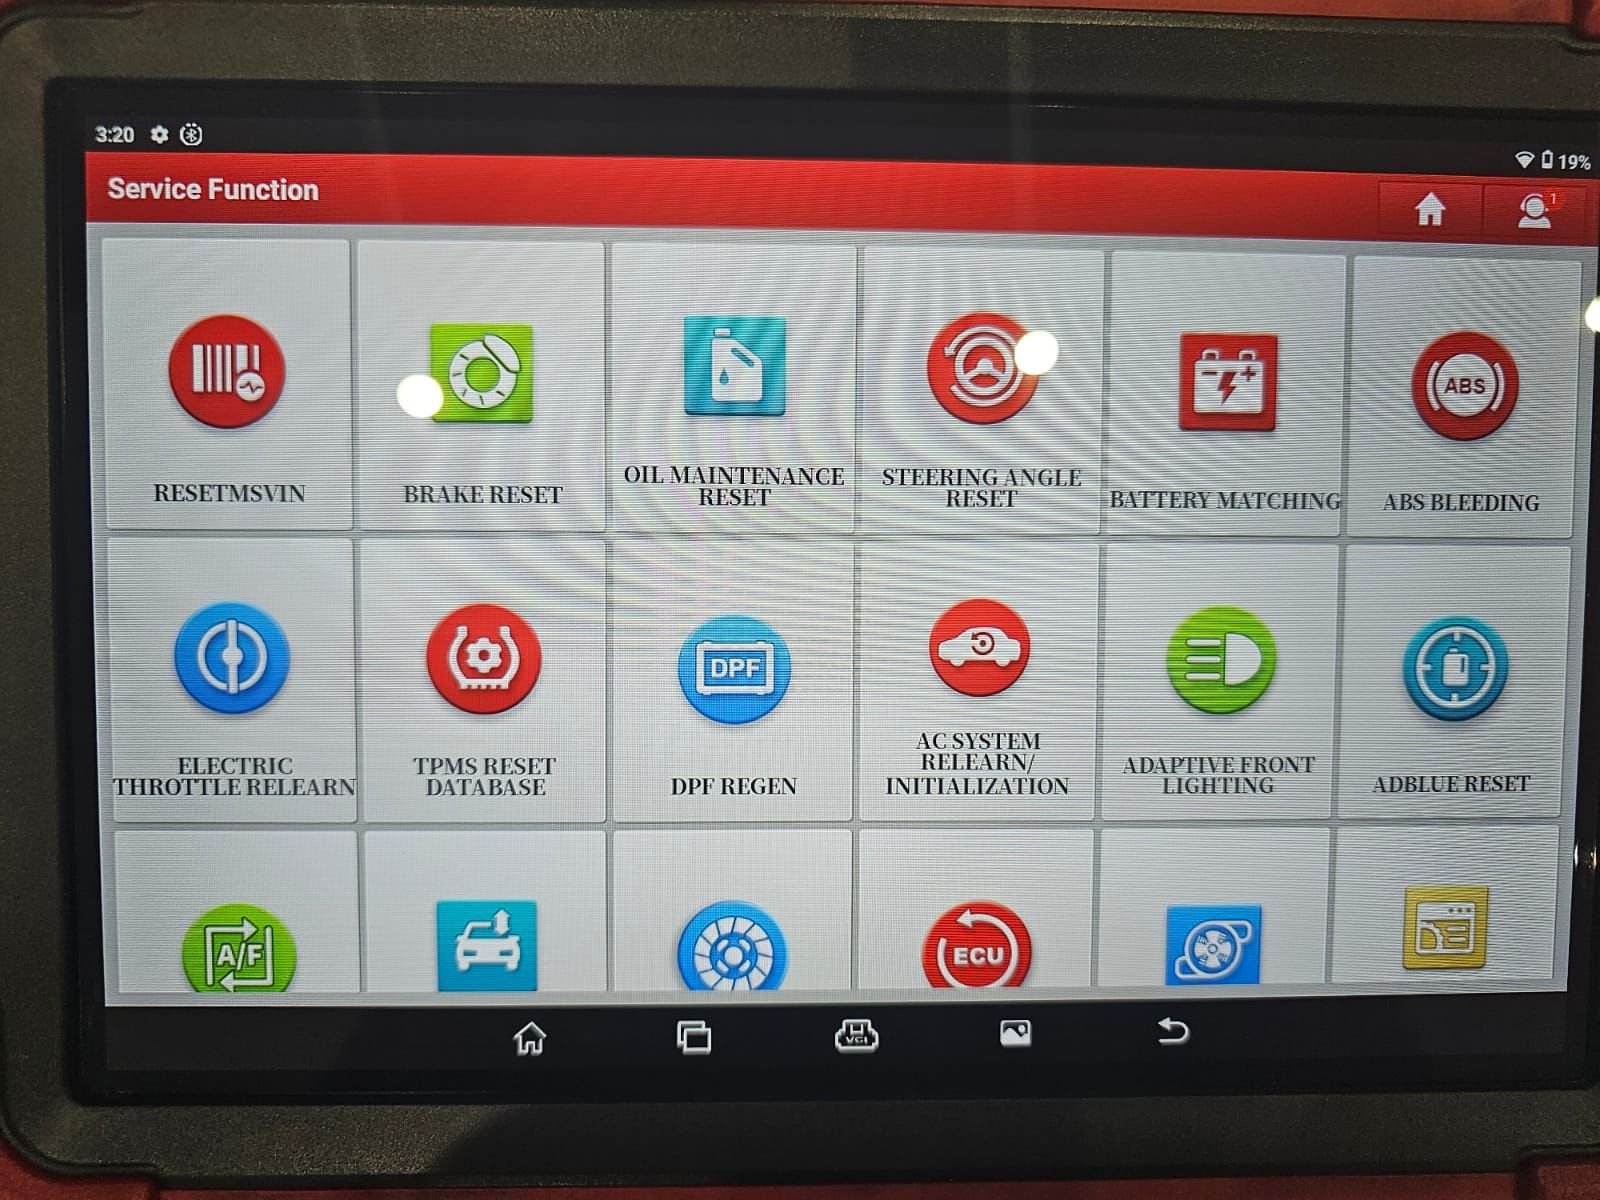
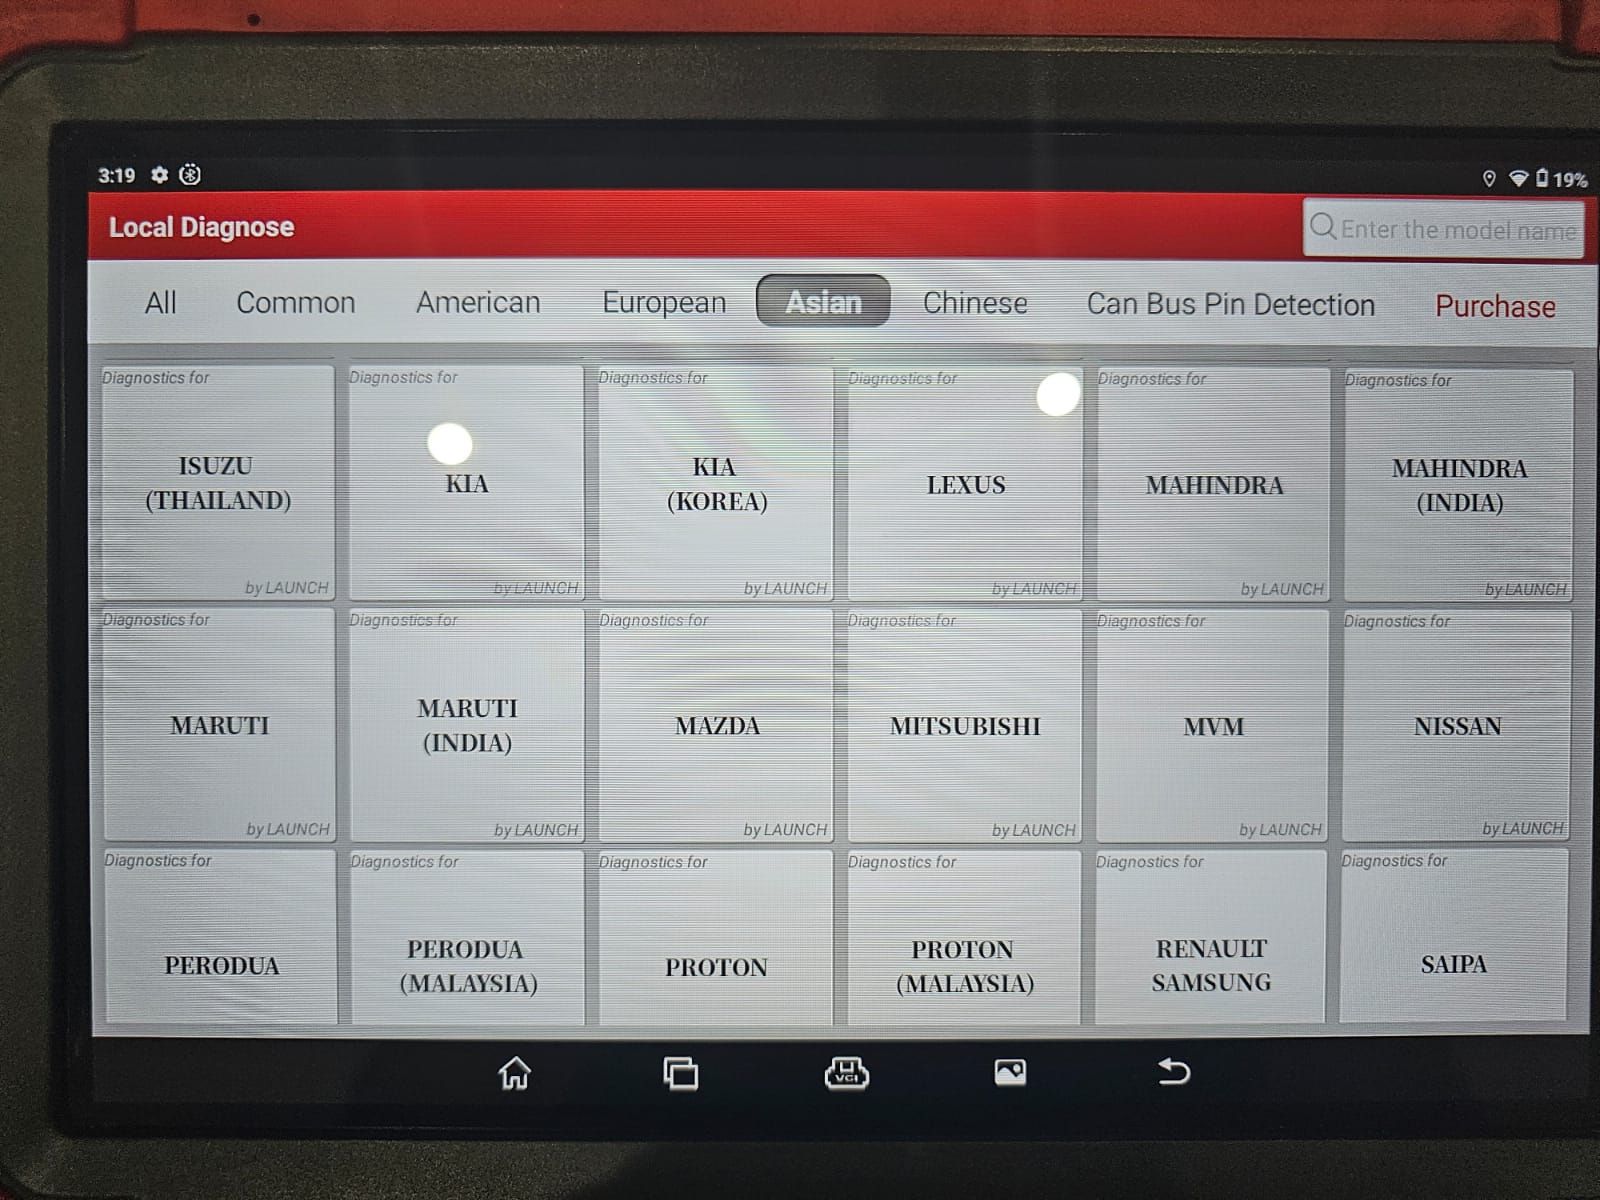
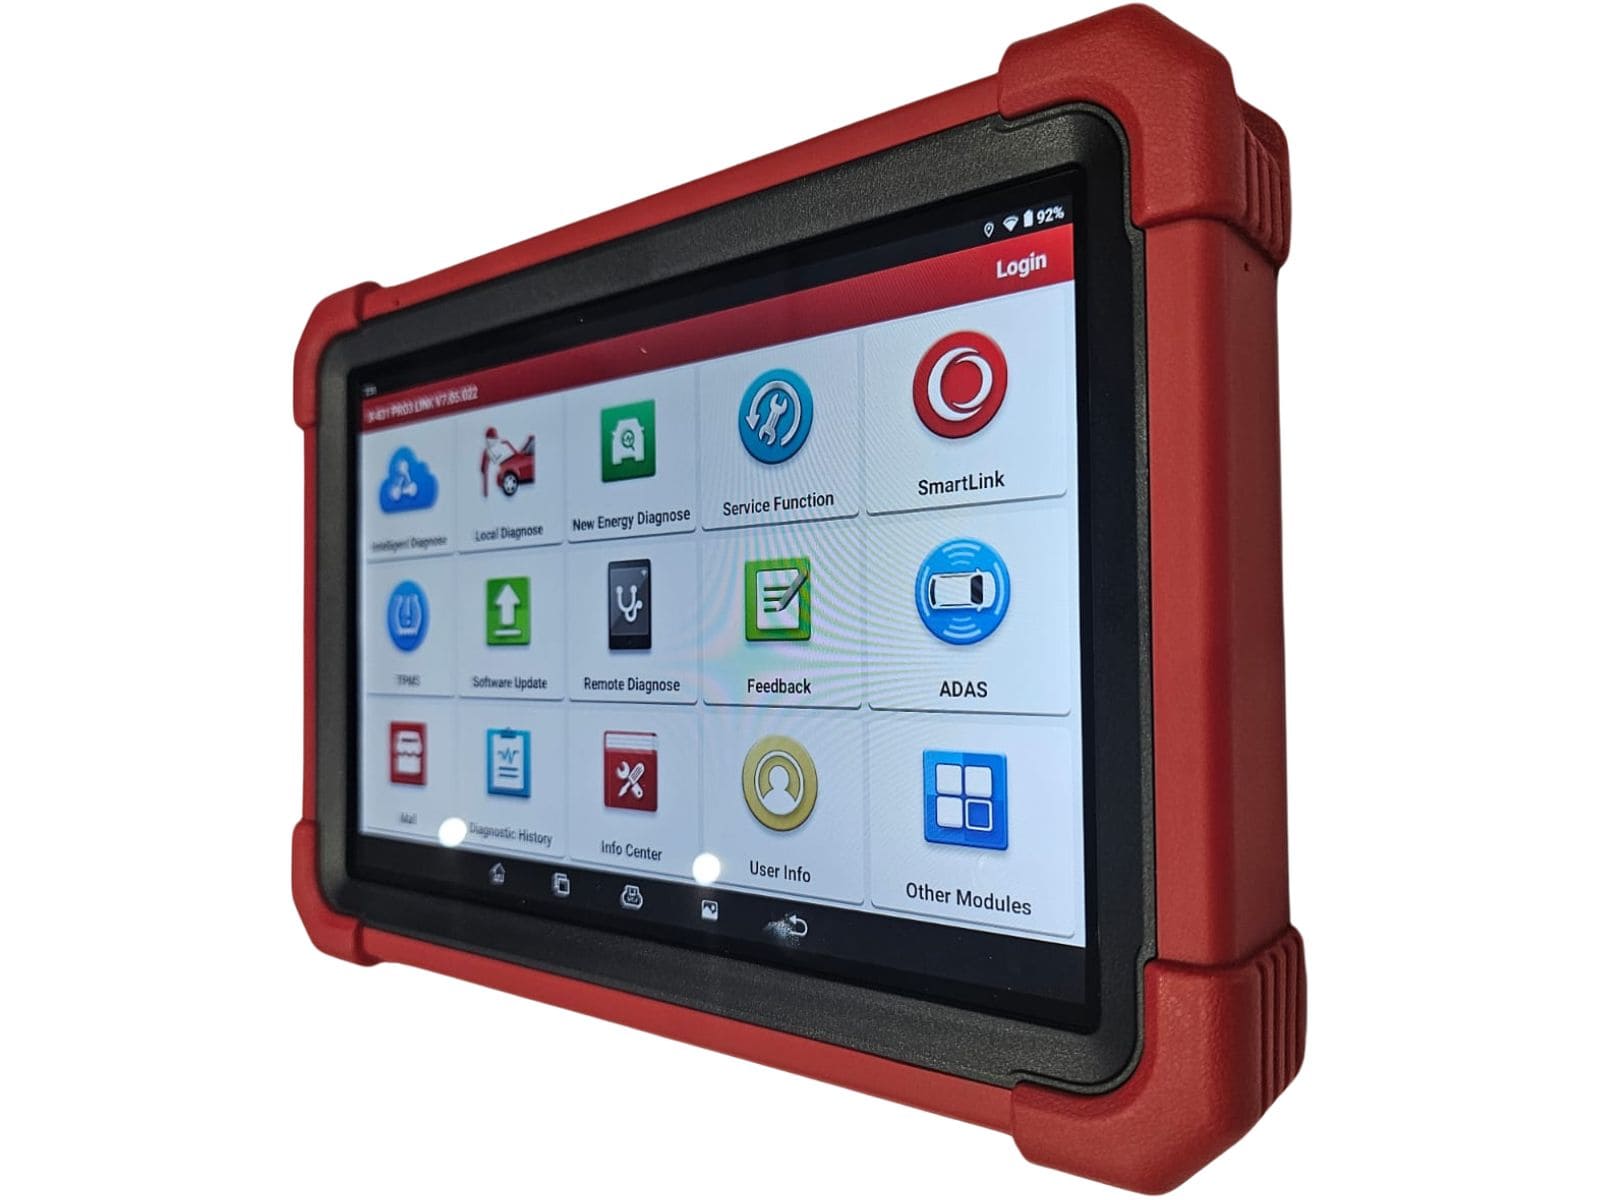
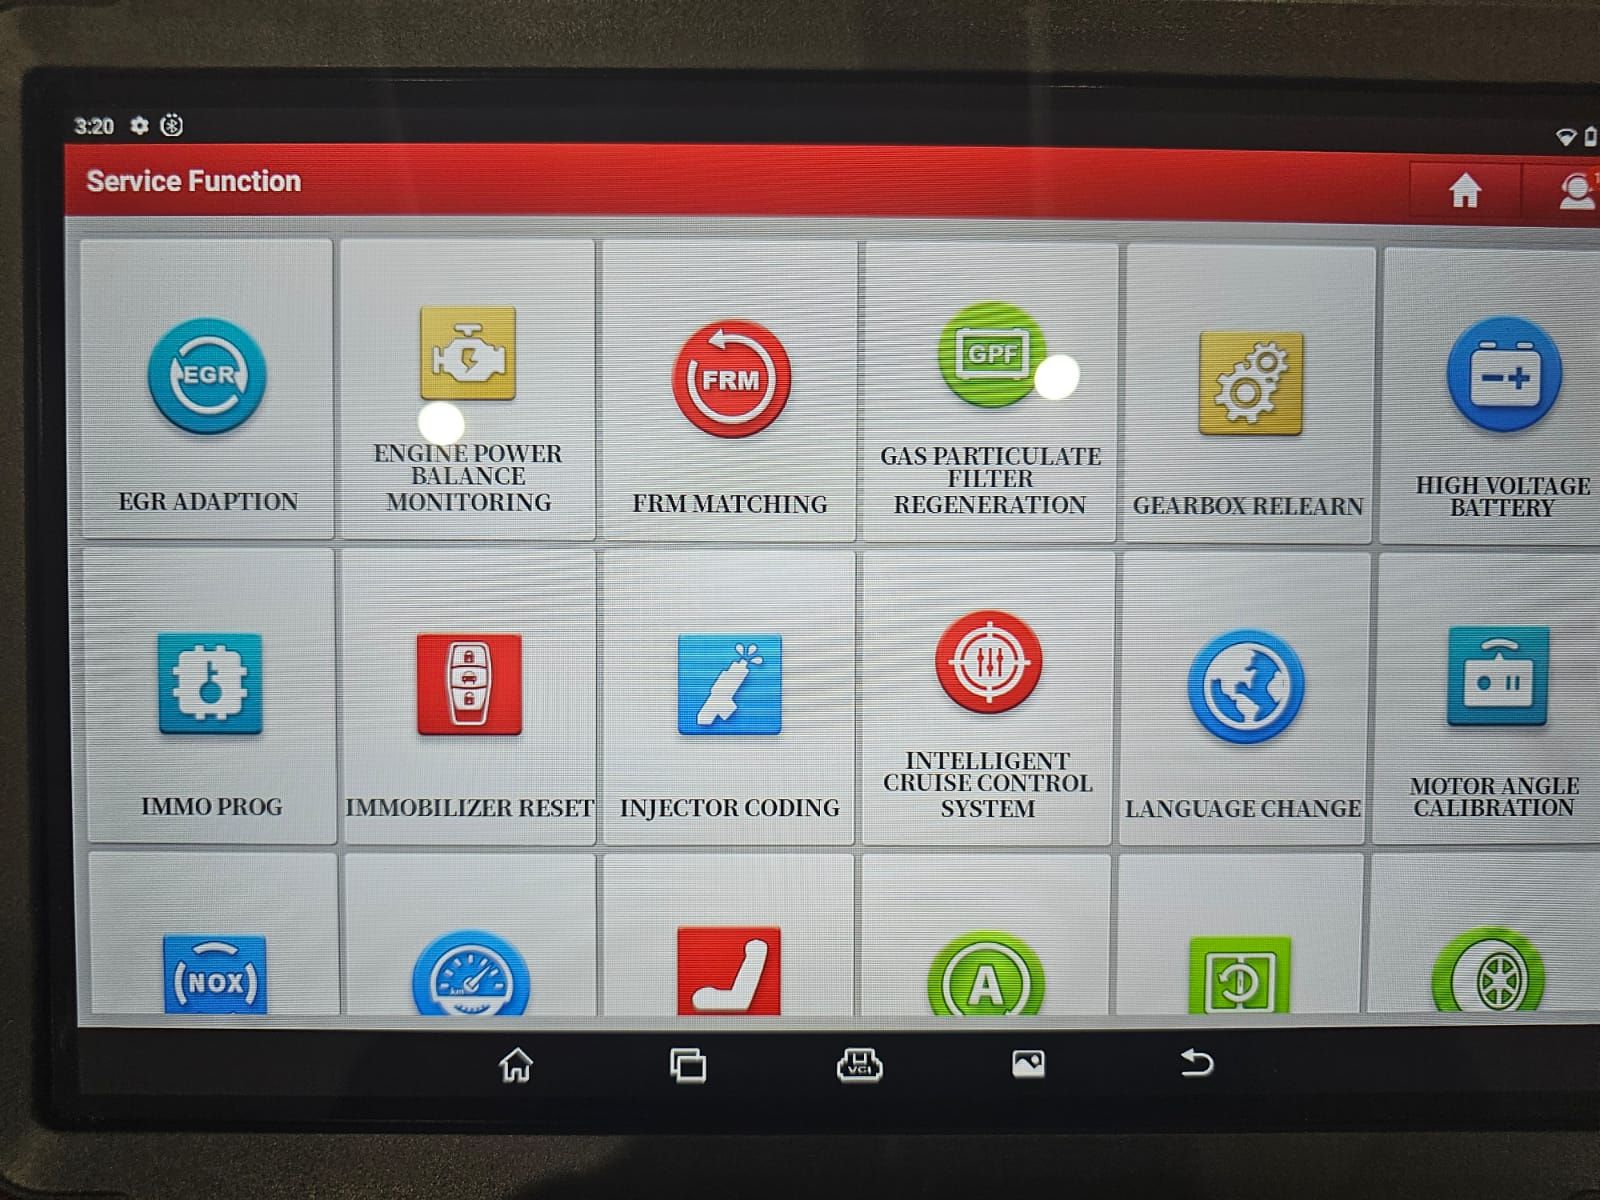
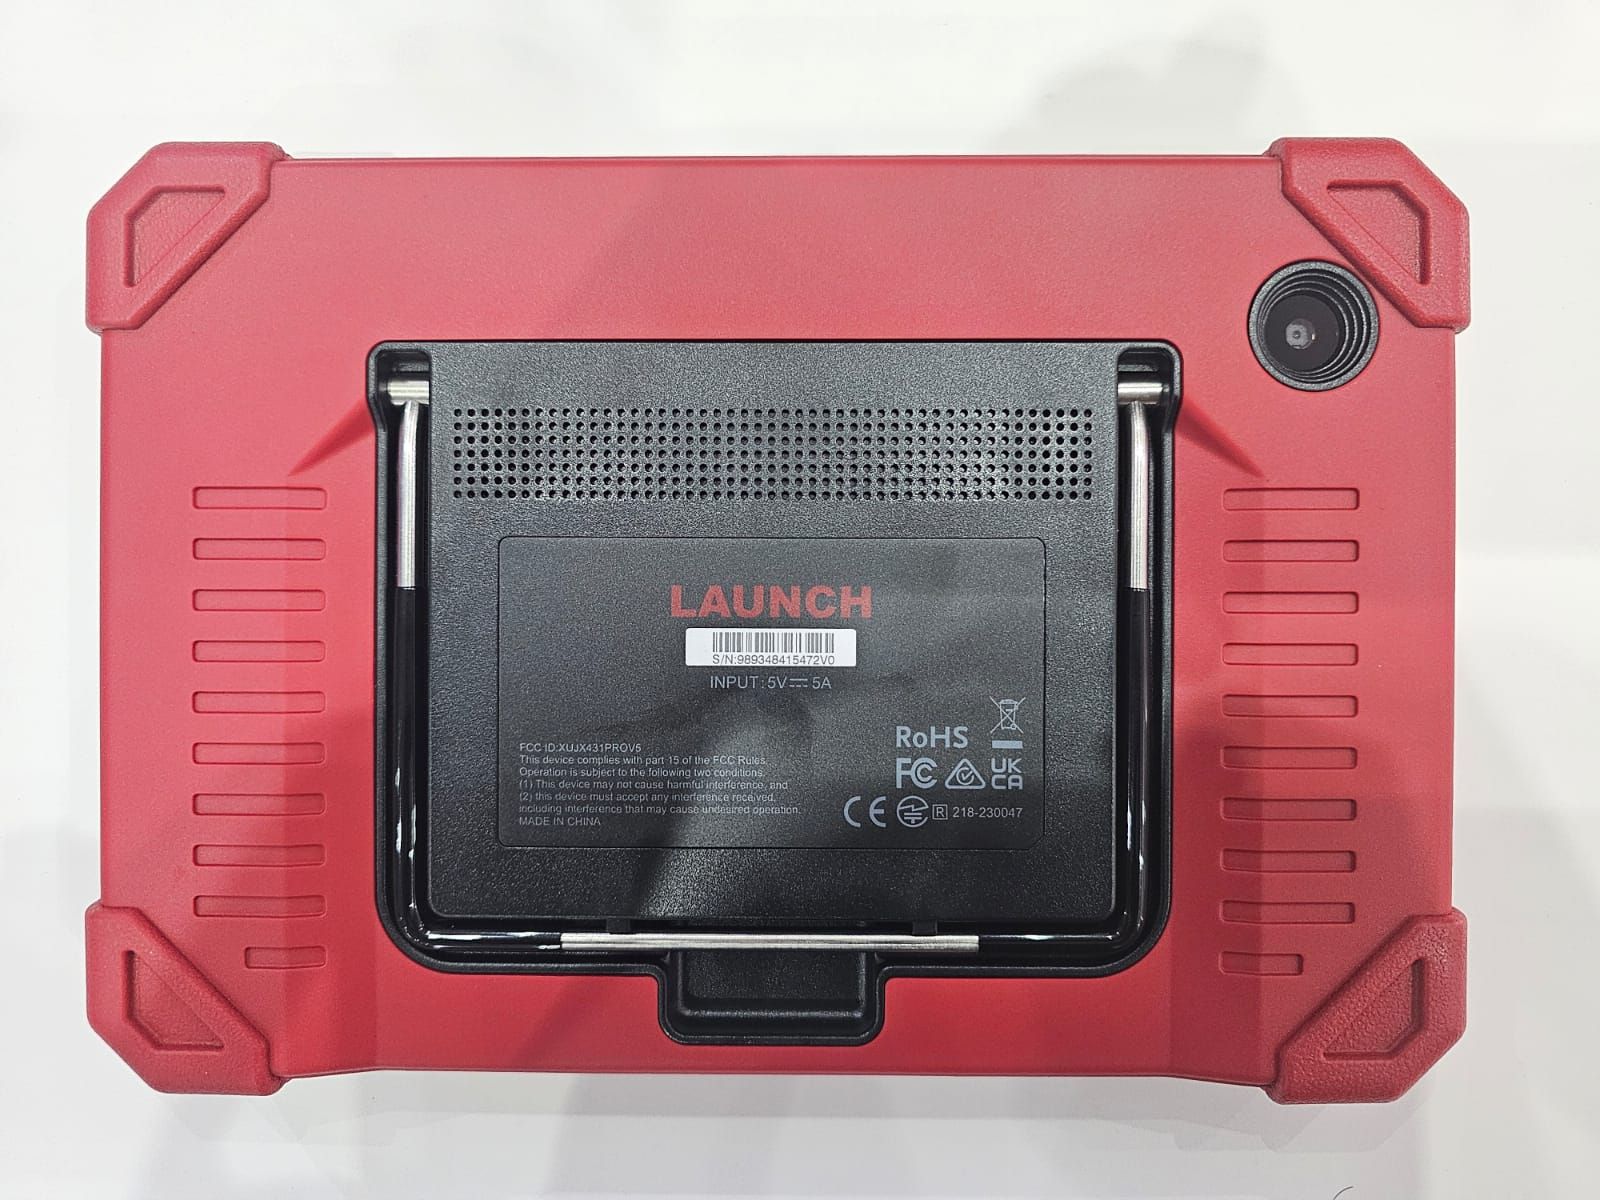
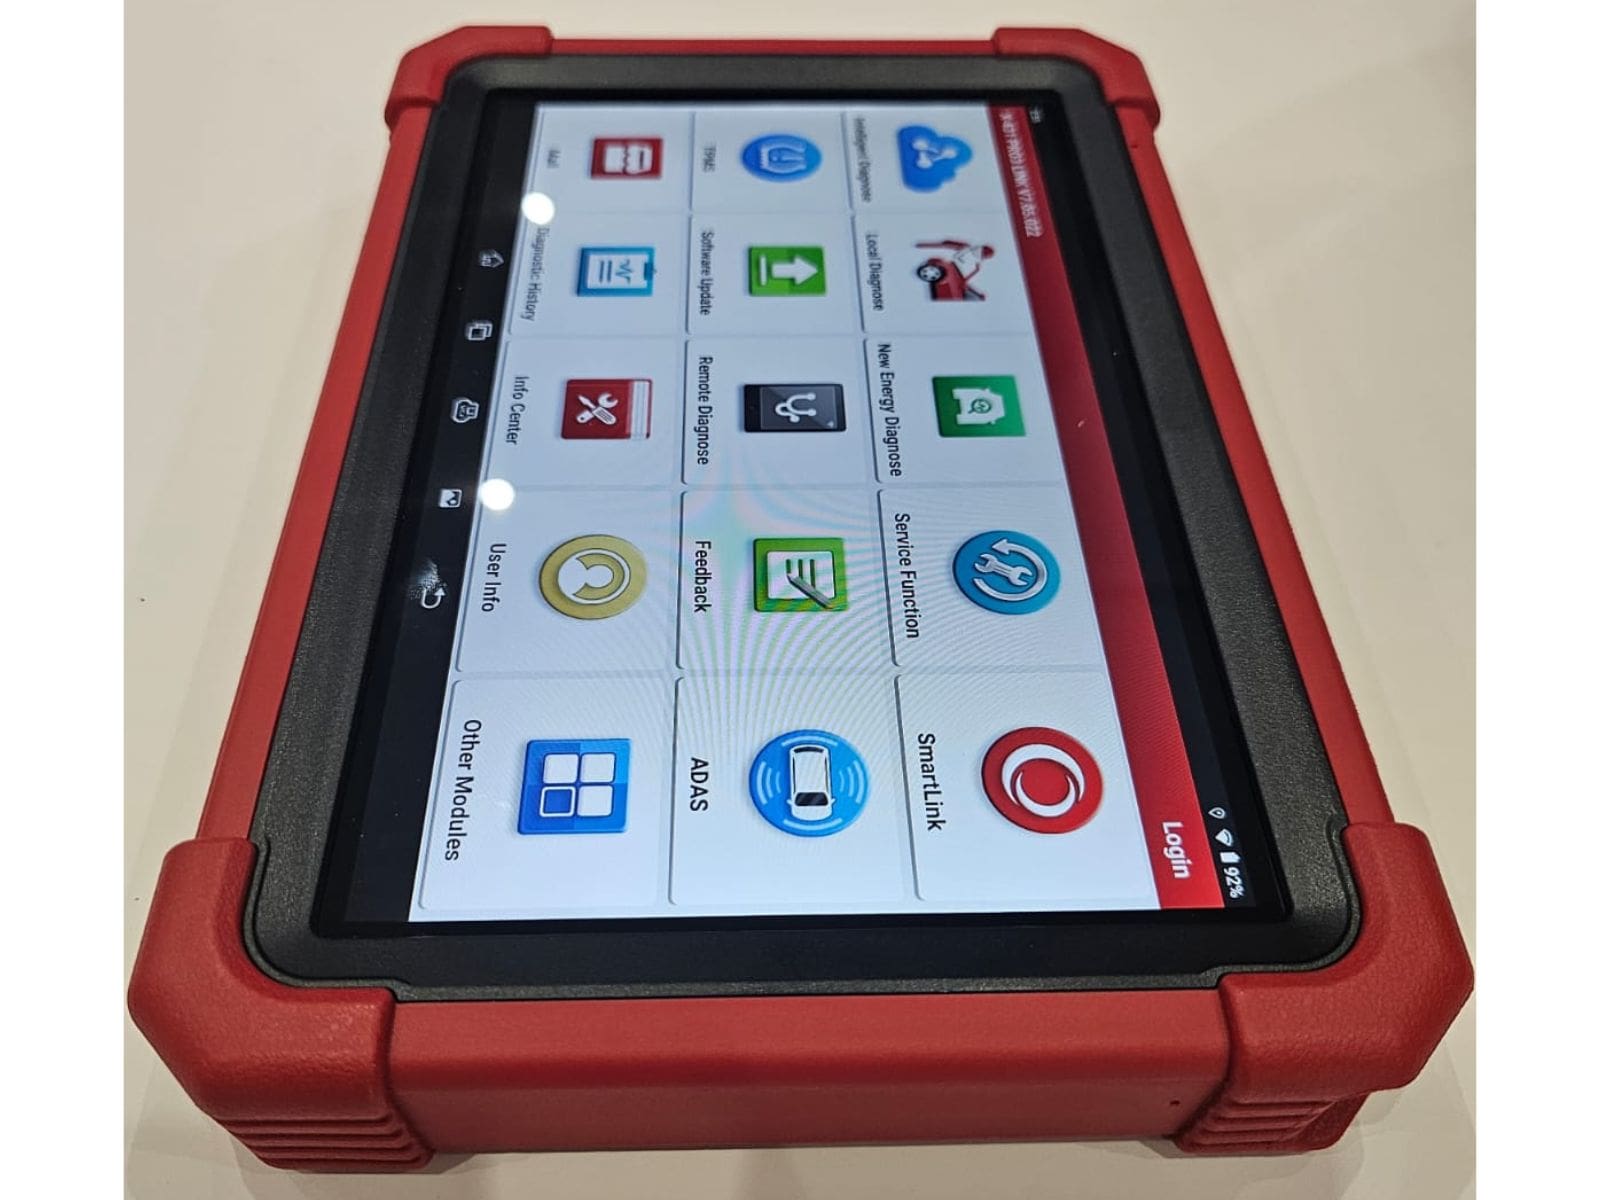
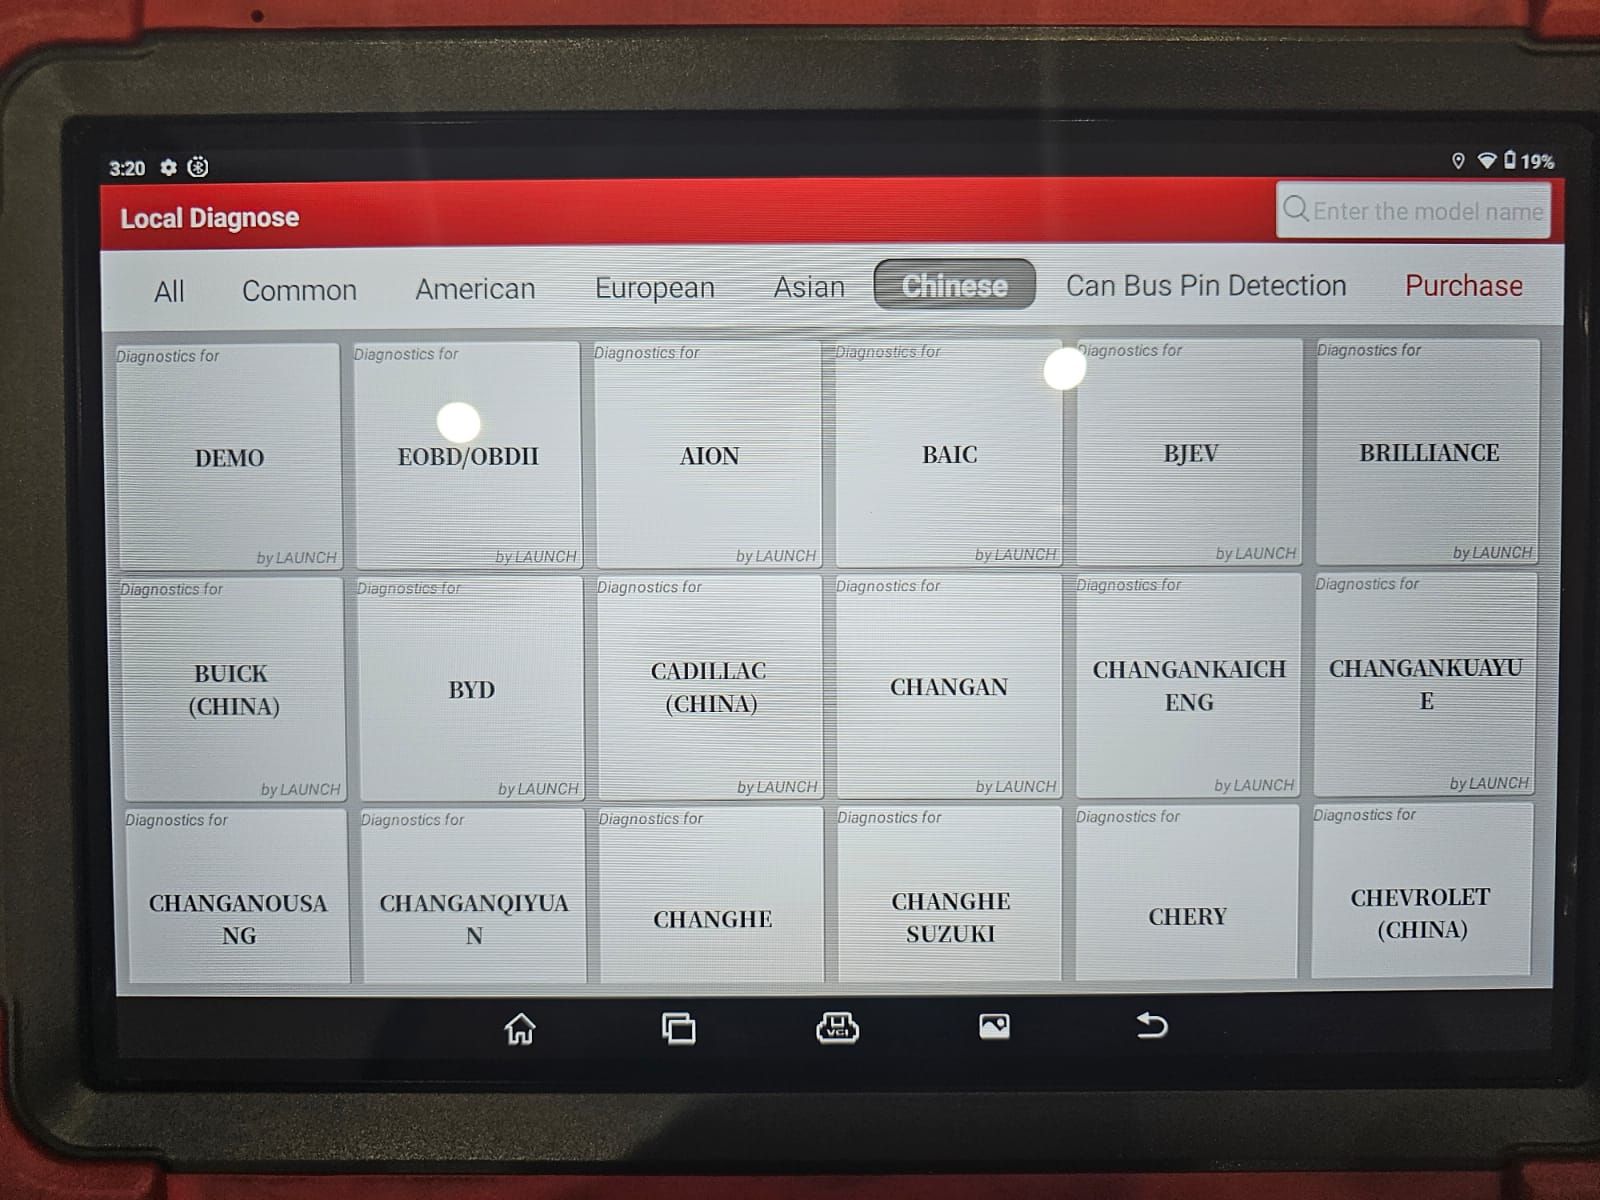
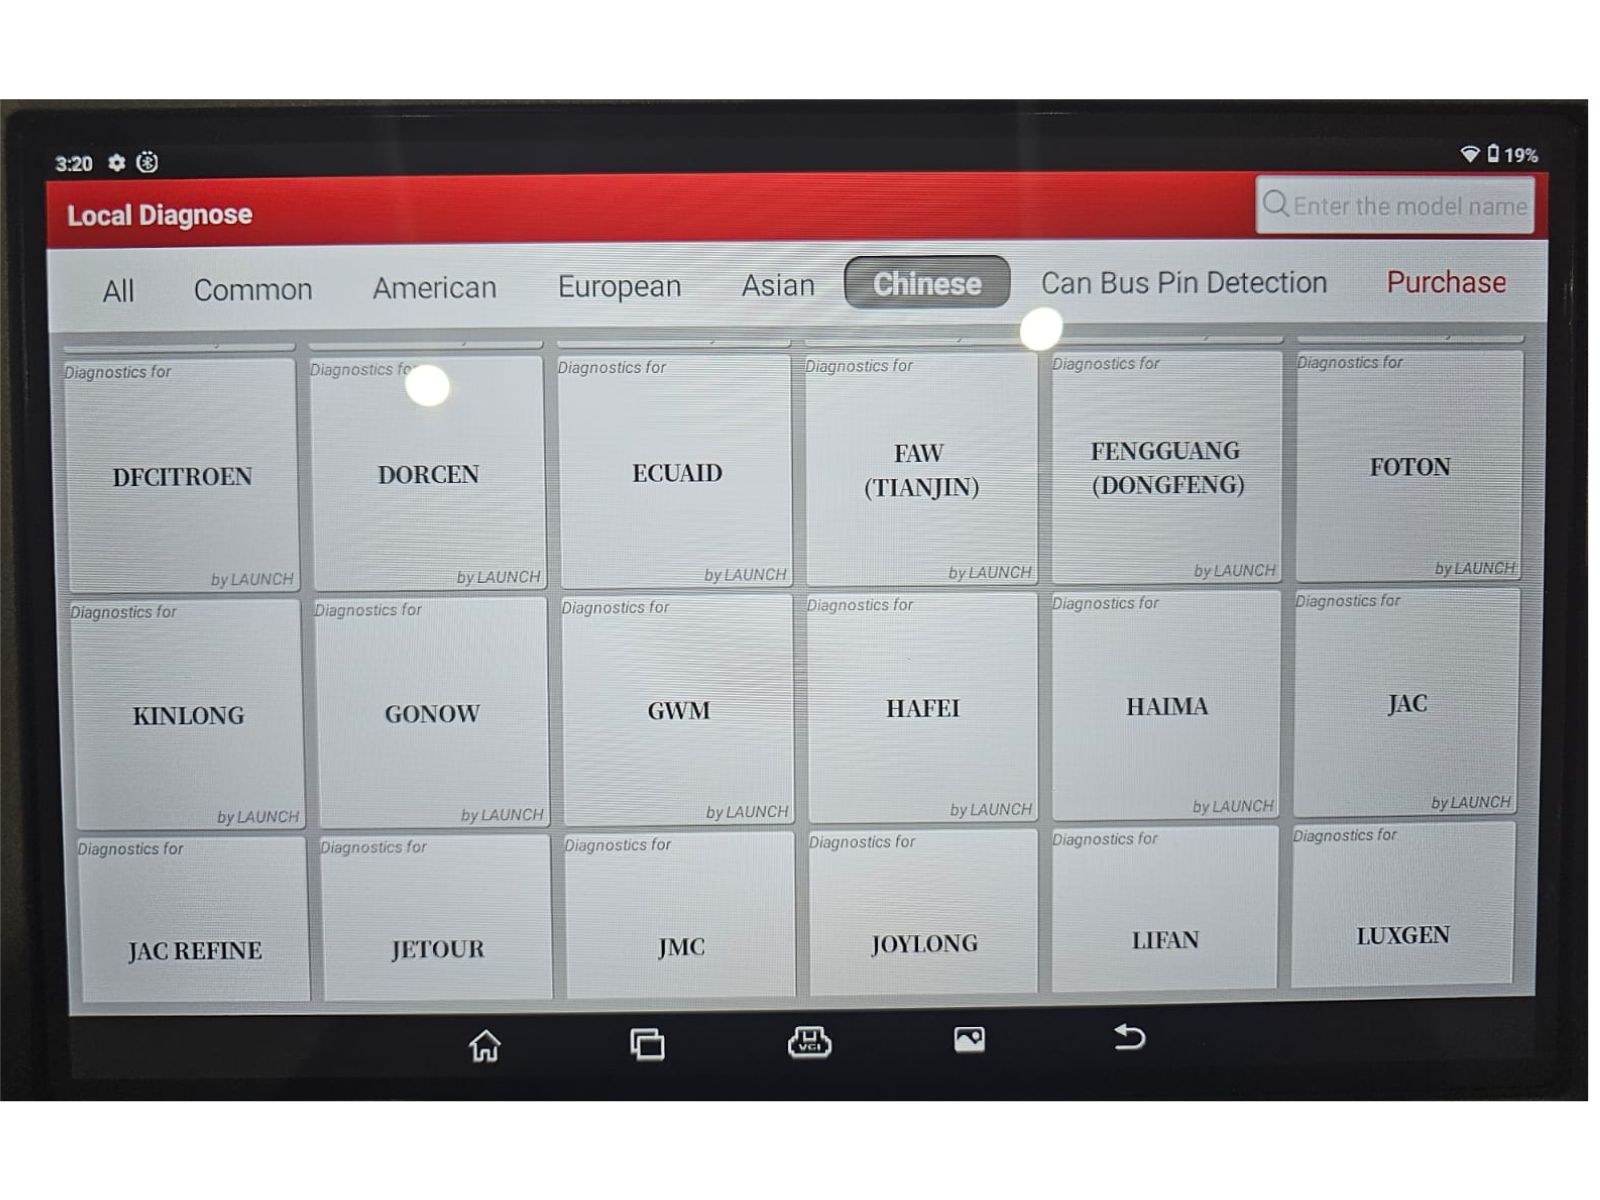
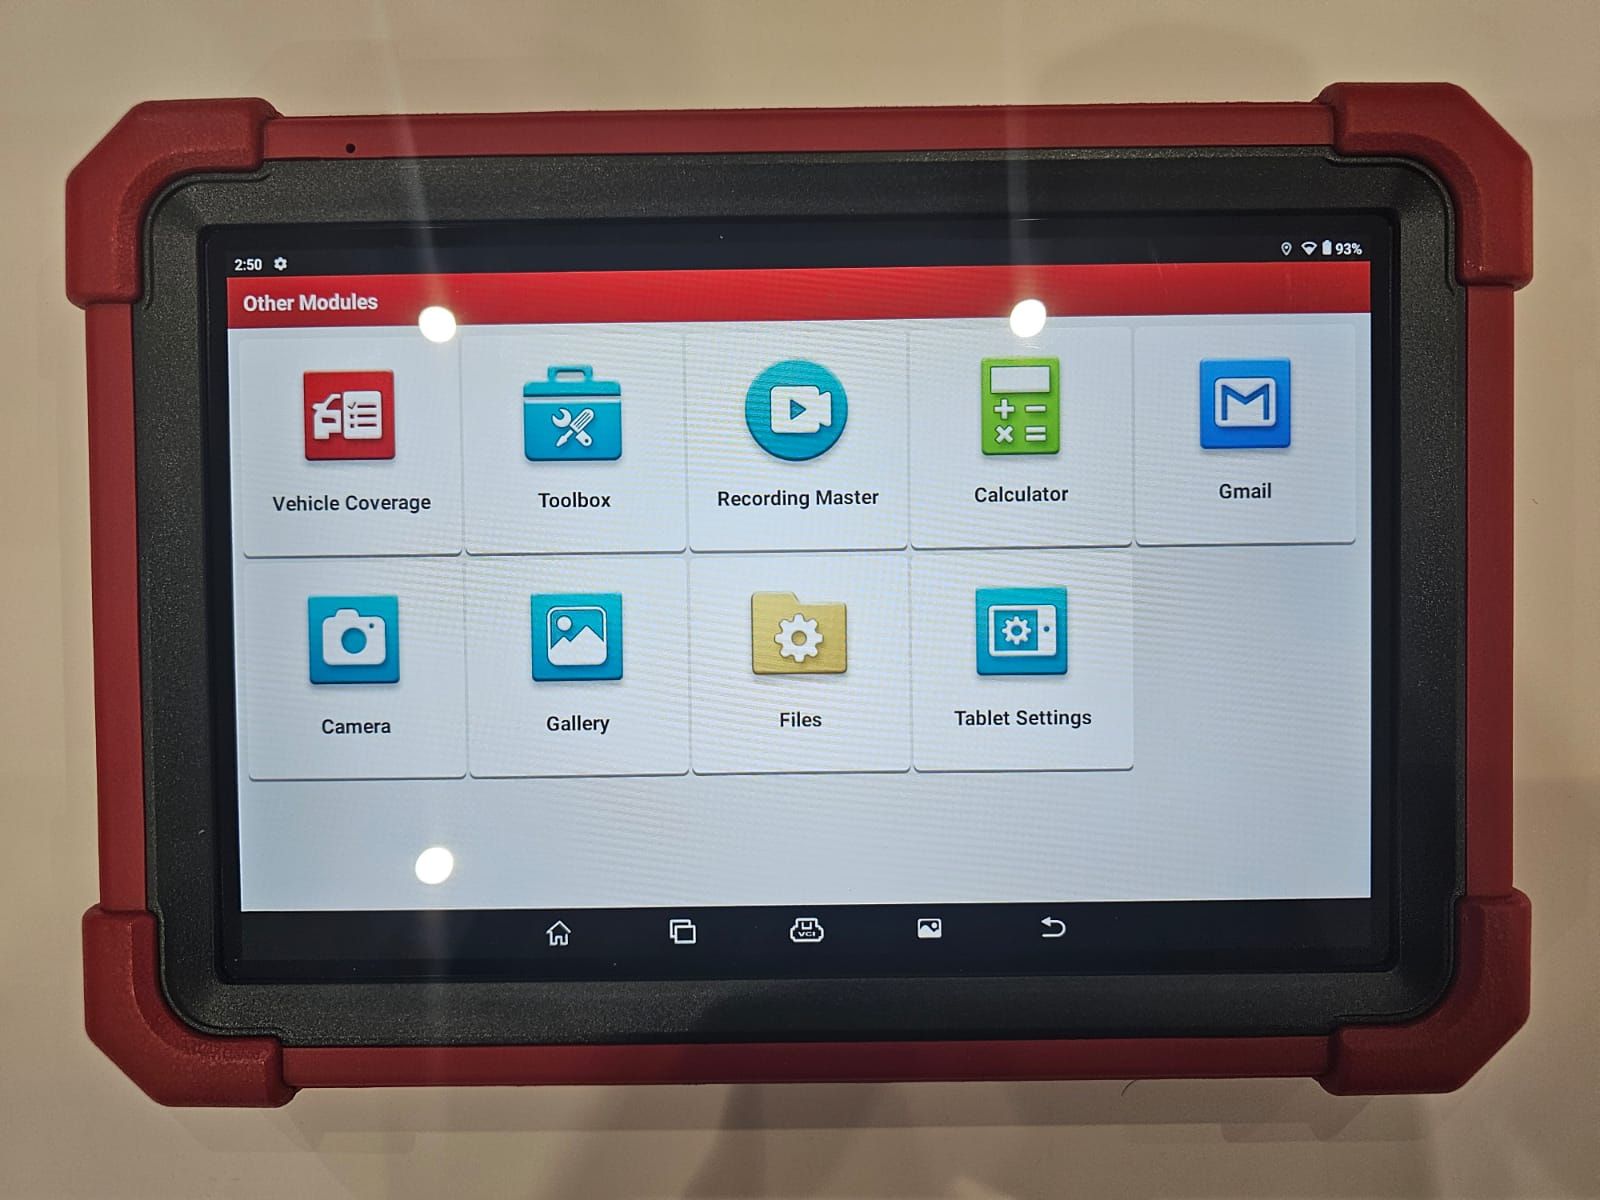
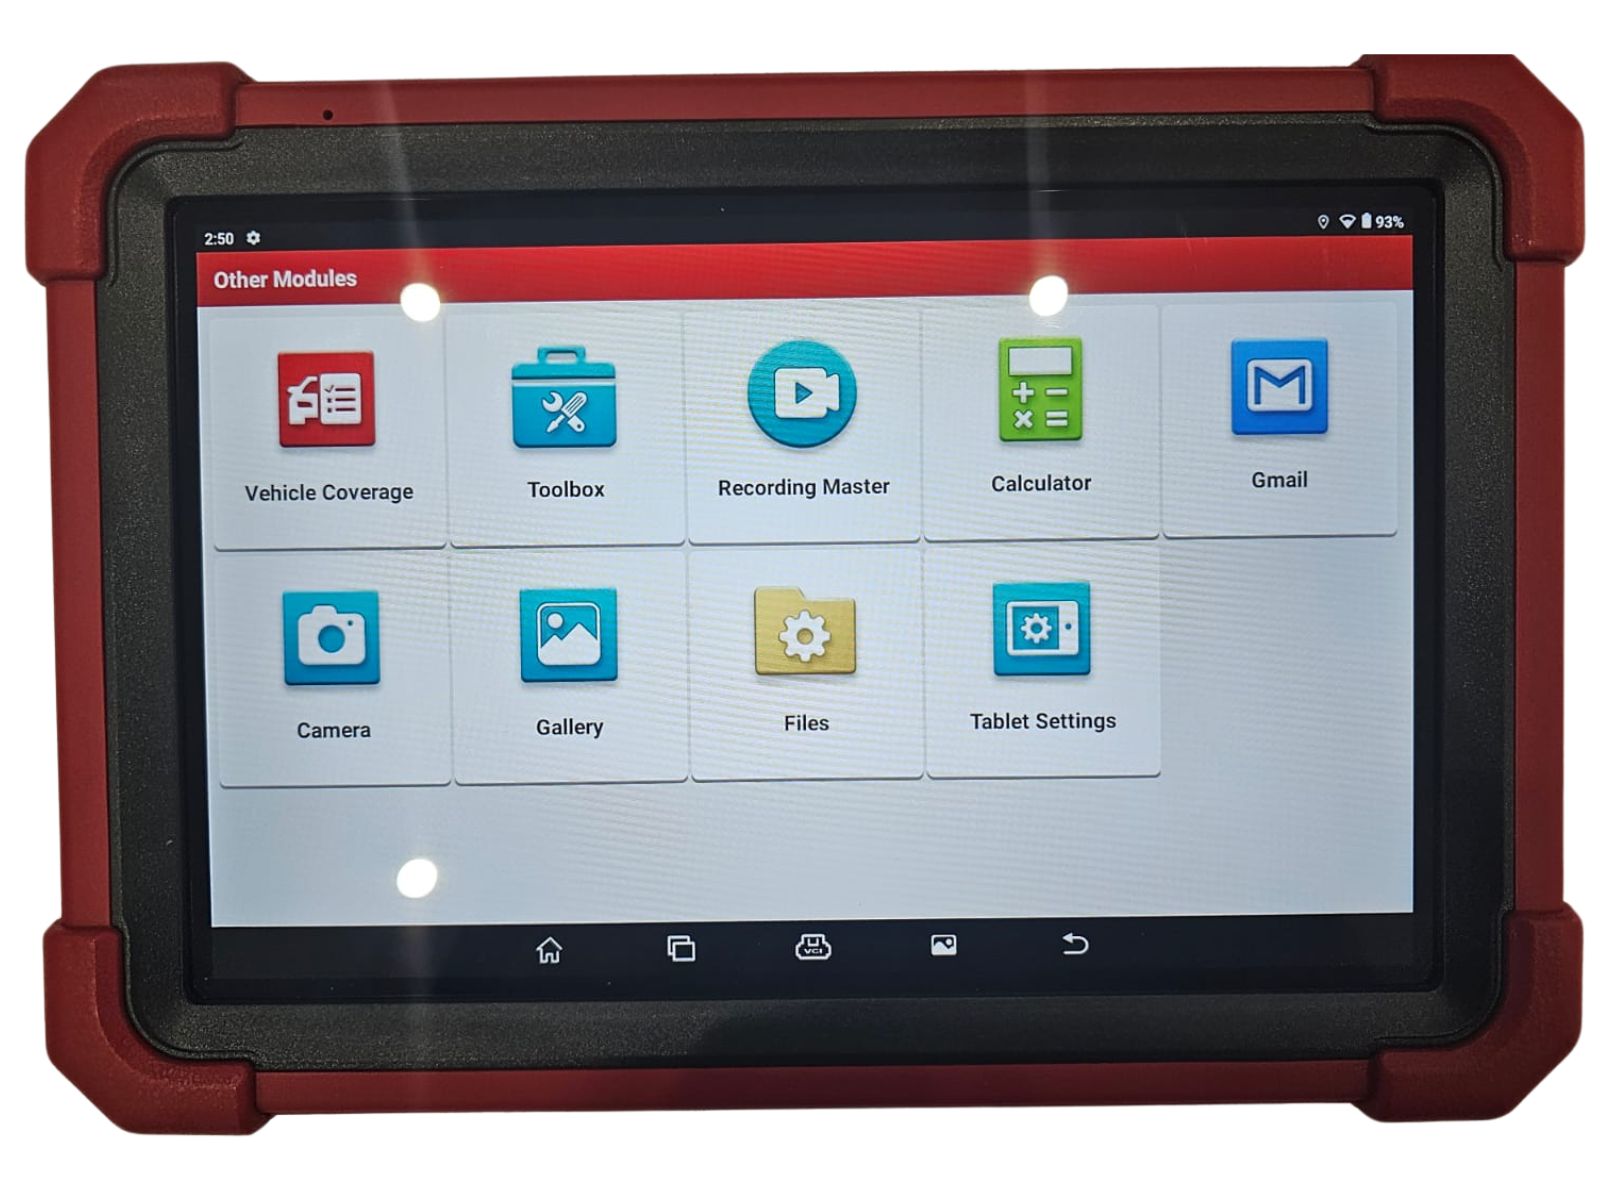
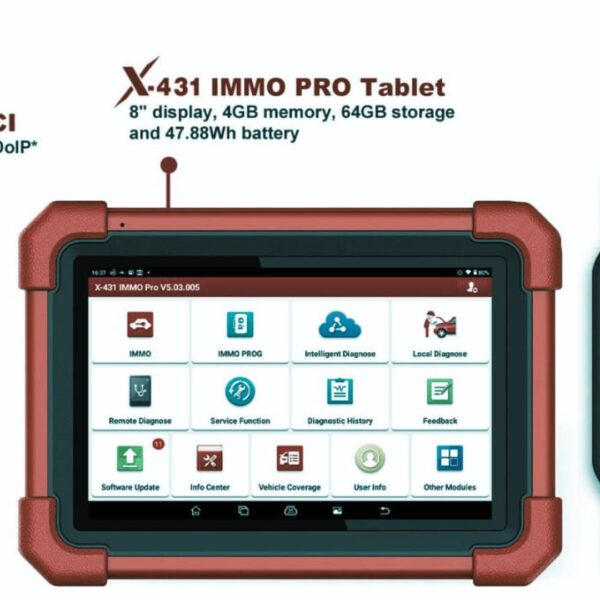


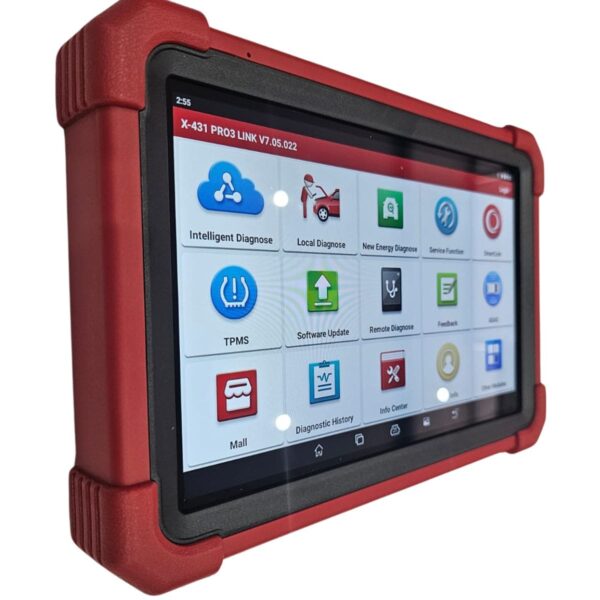
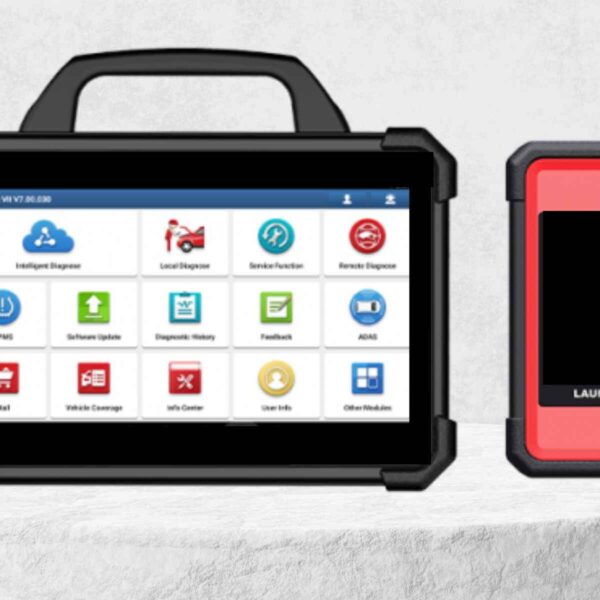



ورشة السلام –
الجهاز رائع ومميز شكرا
المهندس –
مجهود رائع شكرا للمساعدة
ورشة العرب –
تعاملكم راقي شكرا مهندس احمد
ورشة جدة –
الجهاز قيمة للمكان
ورشة العراقي –
والله ماقصرتوا وتستاهلوا كل خير مشكورين
اسلام ميكانيكي –
الجهاز مميزاته والنظام ممتاز جدا
ورشة مكة –
من احسن من تعاملت معهم
ورشة النور –
ممتازين جدا ورائعين
ورشة نويبع –
شكرا لتعاملكم والدورة المميزة
الورشة الحديثة بمكة –
احسن ناس تعاملت معاهم شكرا لكم
هودي للسيارات –
مشكورين
ورشة الشعلة –
شكرا لتعاملكم ومساعدتكم لي
ورشة الدمام العالمية –
مشكوووووووورين على الدورة والمساعدة
ورشة نور –
جزاكم الله كل خير ماقصرتوا تستاهلوا نتعامل معاكم 1000 مرة
ورشة العرب –
شكررررررررررررررررررا
محمد علي –
مشكورين ماقصرتوا
رجب الدمام –
اشتريت من شركات كثير بس انتوا احسن ناس في الدعم والمعاملة الحسنة شكرا مهندس احمد
ورشة الفضاء –
جزاكم الله خيرا ووفقكم ماقصرتوا معاي
محمد العتيبي – الرياض –
خدمة ممتازة، الجهاز استجاب بسرعة والتحديث تم في نفس اليوم، أنصح الجميع.
سلمى الحربي – جدة –
الفريق تعامل بلُطف وشرح كل الخطوات بوضوح. التحديث أحدث فرقاً في أداء سيارتي.
عبدالله الشمري – الدمام –
جربت عدة ورش قبل، لكن خدمات لانش الخليج كانت الأسرع والأفضل من حيث الجودة.
نورة القحطاني – مكة المكرمة –
التشخيص كان دقيقاً وأعدّوني تقريراً مفصّلاً. شعرت أنني فعلاً حصلت على قيمة مقابل مالي.
فيصل الزهراني – أبها –
التعامل احترافي جداً، الأسعار واضحة بدون مفاجآت، والجودة ممتازة.
ماجد السبيعي – بريدة –
الخدمة شاملة — ليس فقط جهاز الفحص، بل شرح لك كل ما يلزم بعد التحديث.
أحمد العنزي – الرياض –
أشكر شركة لانش الخليج على الدورة المجانية المفيدة. الشرح كان مبسط وواضح جدًا، وفريق الدعم متعاون لأبعد حد. تجربة تستحق التقدير!
مشعل القحطاني – مكة المكرمة –
شكراً لانش الخليج على اهتمامكم بالعملاء. الدورة كانت ممتازة والمحتوى متقن، والتعامل راقٍ من أول اتصال حتى التسليم.
فهد الغامدي – المدينة المنورة –
شركة مميزة بكل المقاييس. الأجهزة أصلية والجودة عالية جدًا. أشكرهم على الدورة المجانية التي ساعدتني أفهم الاستخدام خطوة بخطوة
Anonymous –
الورشة الألمانية
ورشة الدمام –
خدمة ممتازة ودعم يستااهل
الورشة الألمانية –
مشكووووووورين خدمة ممتازة